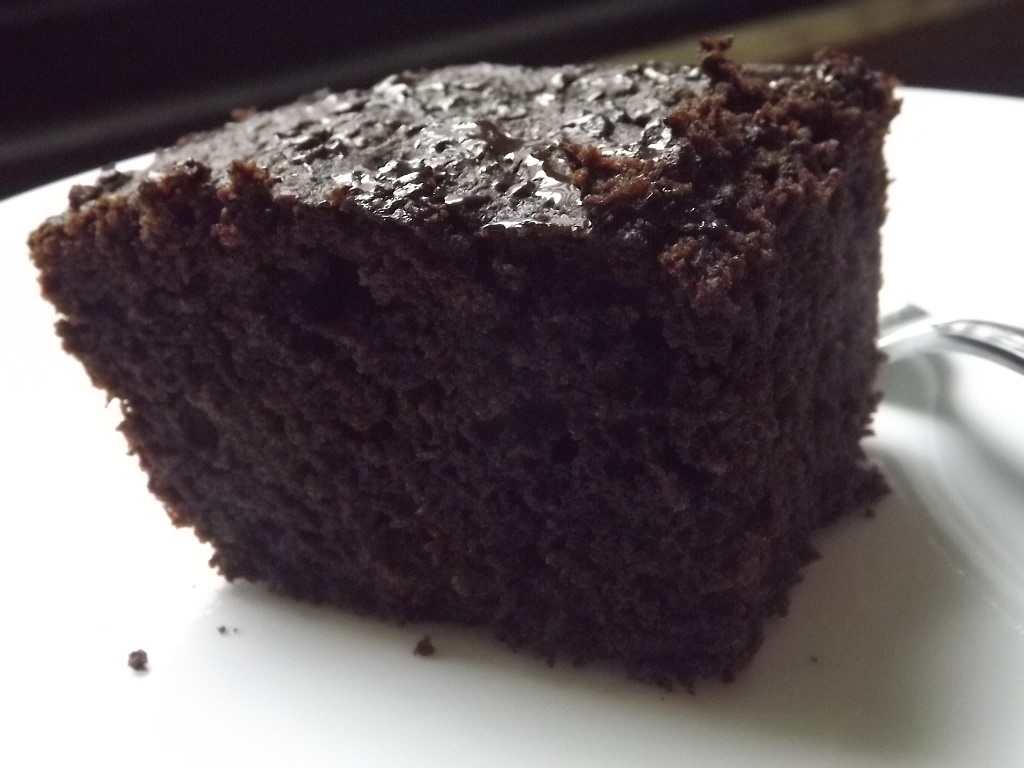
I got this craving for a brownie so I went to the kitchen and threw stuff together and it worked! That is literally how this came to be.
Author: FaylinaMeir
Serves: 6 pieces
Ingredients
½ cup Coconut Flour
¼ cup Tapioca Starch
¼ cup Toasted Carob Powder (or ¼ cup cocoa powder)
½ tsp, Baking soda
1 tsp Baking Powder Aluminum Free & Double Acting
3 eggs
¼ cup plus 2 tablespoons Coconut Milk
¼ cup Honey
1 tsp Pure Vanilla Extract
2 tsp apple cider vinegar
2 tablespoons Coconut Oil
Instructions
Preheat your oven to 350f (175c).
In a large bowl mix together your eggs and honey until well combined. Then add your apple cider vinegar, vanilla, coconut milk, and coconut oil. Don't worry if your coconut oil forms little solid pieces, this is actually what you want because when the brownie bakes it makes these yummy little pockets. Make sure you whisk this together very well, you don't want the oil chunks very large.
In another bowl, mix the rest of your ingredients together well. You don't want any lumps.
Grease your baking container well; I used a glass loaf pan. Don't use a large pan if you want these to be taller. Once your oven is well preheated, mix your dry ingredients into your wet ingredients and whisk til there are no lumps. Scrape your batter into your container and even it out.
Bake in the middle of your oven for 25-35 minutes (see notes). I like my brownies well done so I went the full 35 minutes. A toothpick inserted into the middle will come out clean. Let cool in the pan for at east 10 minutes. Serve warm, and try some butter on top, it tastes amazing!
Notes
If you want more fudgy/gooey brownies only bake it about 80% done, about 25 minutes. A toothpick will come out almost clean and might be a little jiggly in the middle. Let cool at least 20 minutes.
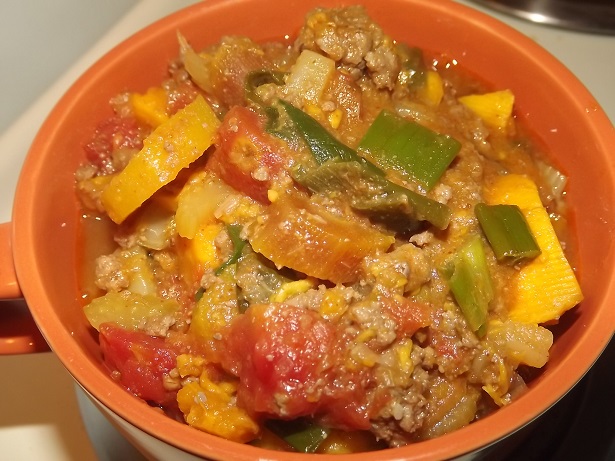
This paleo/primal approved chili is naturally sweet and delicious. It has a good amount of carbs and is super filling! It even tastes great the next day.
Author: FaylinaMeir
Serves: 6 servings
Ingredients
1 pound ground beef
2 tablespoon lard
1 large onion diced or 10 ounces green onions (reserve some tops)
2 pounds sweet potatoes cut into 1 inch cubes
1 lb carrots cut into ½ inch slices
1 lb finally slices celery
2 14.5 ounce cans of diced tomatoes in juice (you can use tomato puree also)
2 cans of water (use the tomato cans)
2 cups chicken stock or beef stock
1 bay leaf
1 teaspoon fennel powder
1½ tablespoon chili powder (you can use up to 4 tablespoons if you wanted it hotter)
1 tablespoon ground cumin
1 tablespoon garlic powder
1 tablespoon fish sauce (optional but suggested!)
salt if needed
Instructions
In a large pot heat your lard (or other cooking fat) over medium high heat. When it's fully heated add in your onions. If you're using green onion (spring onion) reserve the green tops for later. Cook for about 2 minutes, then add in your ground beef. Break it up a little and add a lid to the pan for easier cooking. If you need to you can add a few splashes of water. Let this cook for 3 or so minutes.
After 3 minutes break up your meat into smaller pieces, a nice trick is to use a potato masher for this. When you're happy with the thickness, add in your potatoes, carrots, celery, canned tomatoes + the water, chicken or beef stock, and your 1 bay leaf. Stir well.
Put your lid on and bring to a boil. Once boiling, reduce heat to medium and boil for 40-60 minutes or until a fork goes into the carrots and potatoes with very little resistance.
After the chili is done, add in the rest of your spices, fish sauce, and salt is needed. I suggest taking a little of your liquid and mixing these in a bowl and adding into the chili mix to prevent lumps in the garlic powder, but it's not that big of a deal. Adjust the chili powder to your taste.
You're done! I got 6 servings out of this, about 16 ounces per bowl. The fish sauce isn't required but it's a natural source of umami and really kicks the chili up a notch.
Notes
Fattier beef is preferred in this recipe. All I had was 96% lean so the fat calories are way down for nutrition, if you use 80% it would be better!
You CAN use a slower cooker (I haven't done it yet though), my guess is 6-8 hours on low or 4-6 hours on high.
Please note that you want the bare minimum of liquid here, this is going to be a very hearty chili!
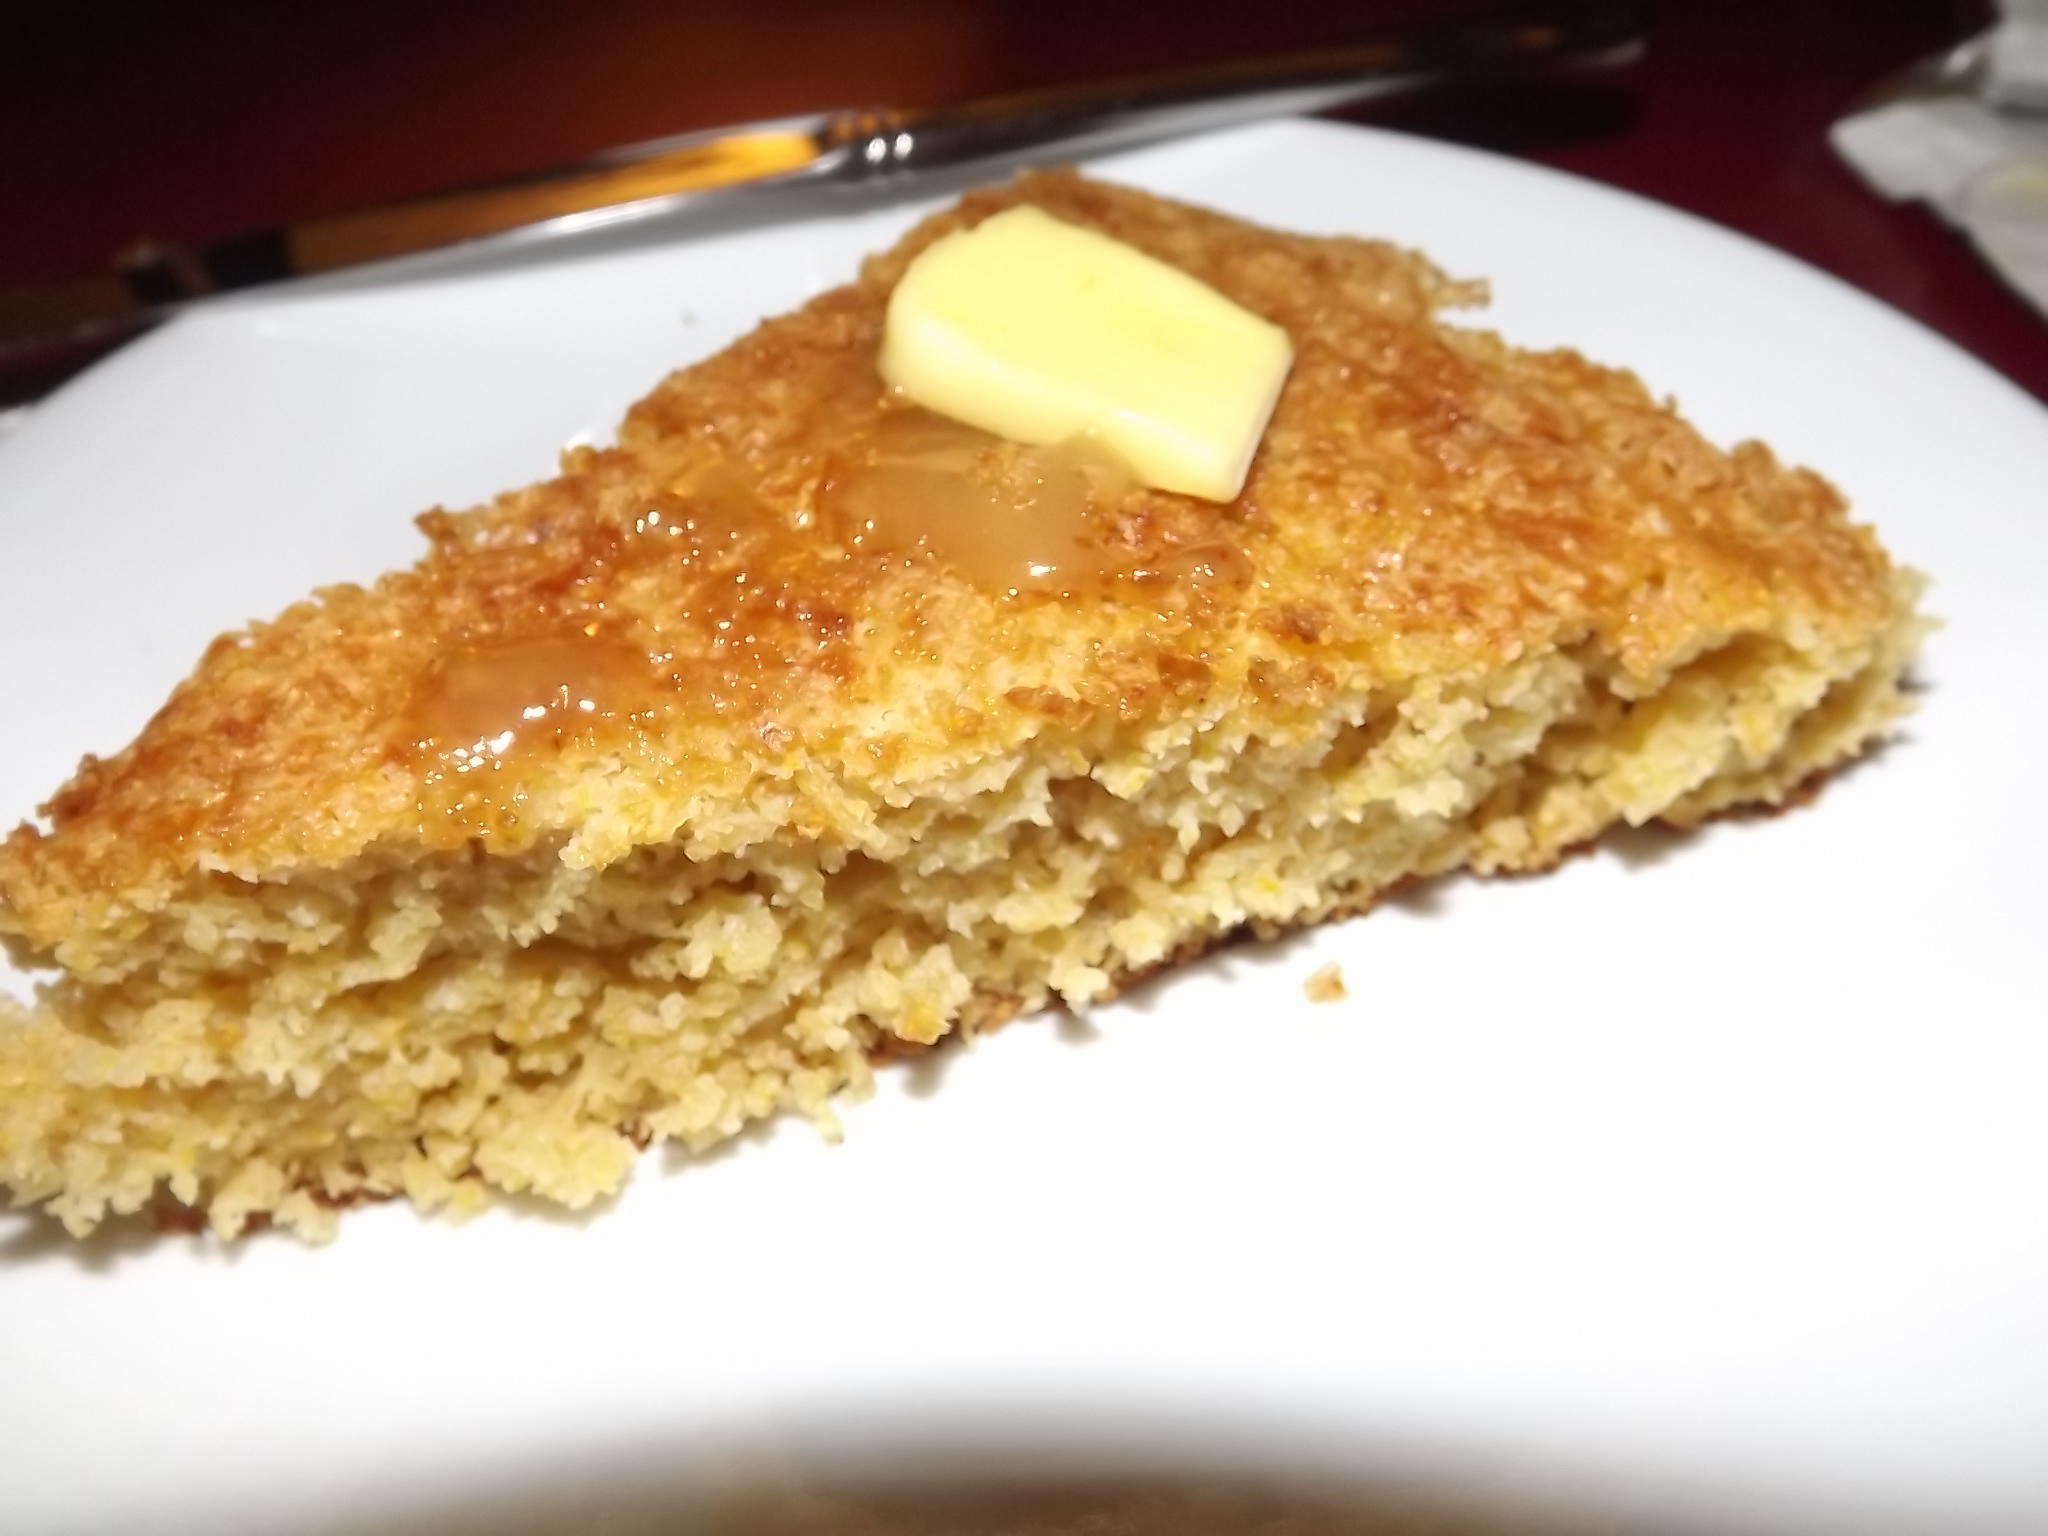
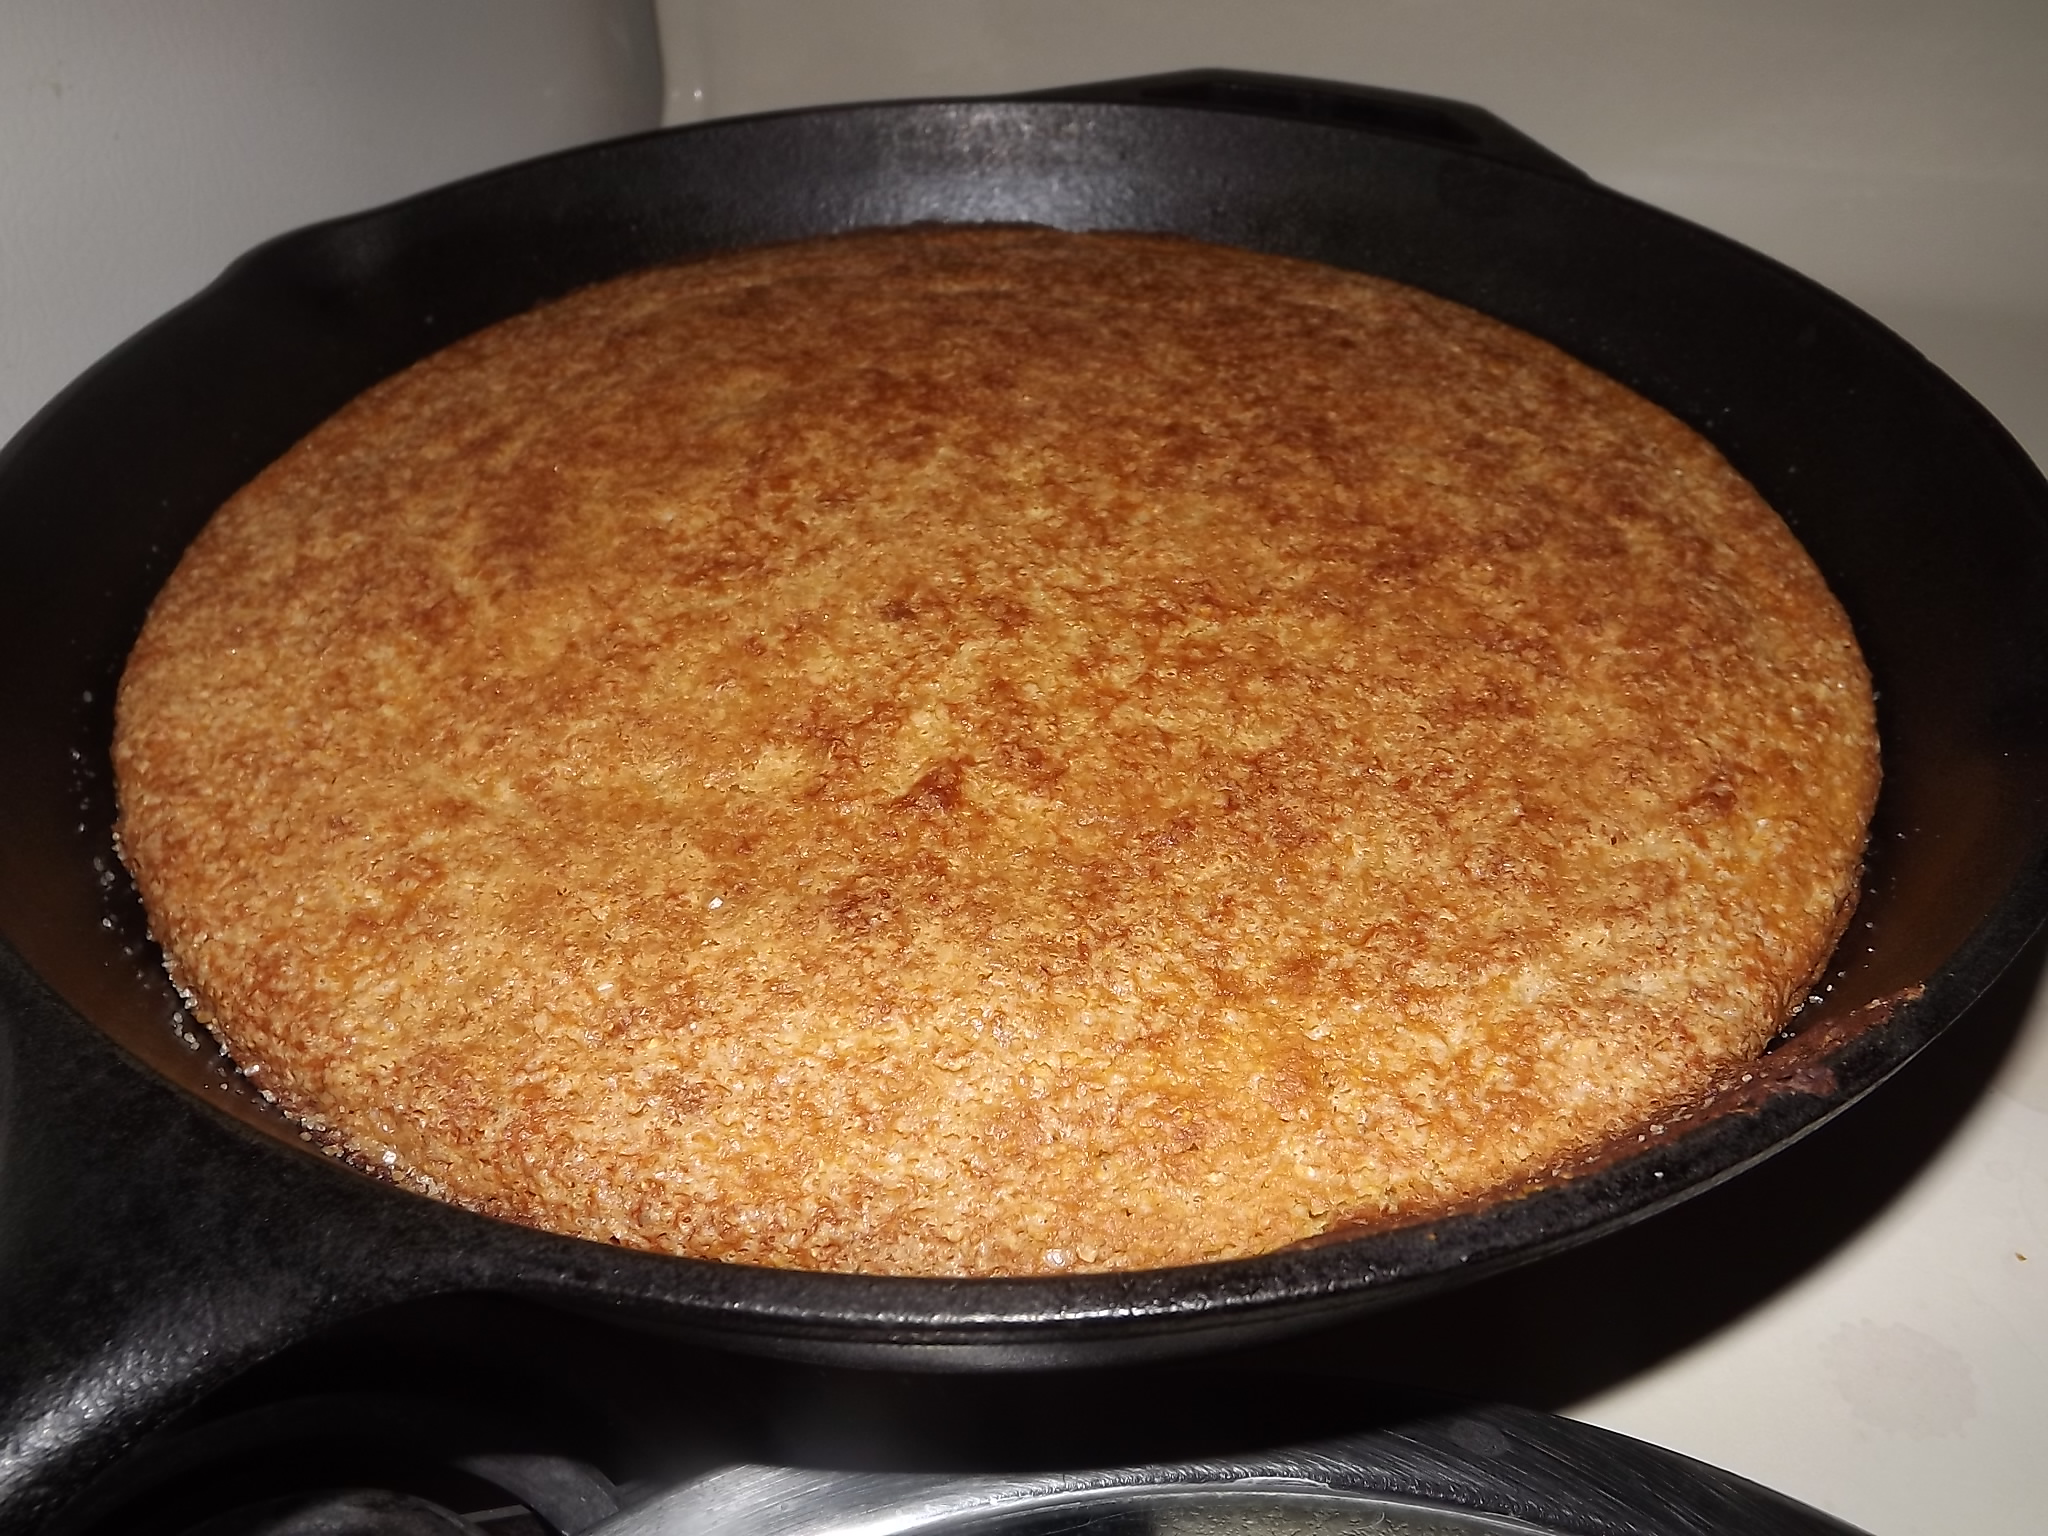
Cornbread can be made quickly, simply, and without a lot of fuss. Importantly it tastes AMAZING. Low calorie is a plus!
Author: FaylinaMeir
Serves: 8 slices
Ingredients
1 cup cornmeal
1 cup whole wheat flour
1 cup milk
1 tablespoon vinegar
1 large egg
½ cup water
½ cup unsweetened applesauce
1 tablespoon oil for batter, can also use melted butter
1 tablespoon oil for greasing pan
¼ to 1 cup of sugar (see notes)
1 tablespoon baking powder
½ teaspoon baking soda
Instructions
Preheat your oven to 400 degrees Fahrenheit, this is approx 200 Celsius. If you are using a cast iron skillet, and you SHOULD, put that in to preheat as well.
Add your milk and vinegar into a bowl on the side and let this set for a few minutes, this makes faux buttermilk. If you want you can just use buttermilk instead without the vinegar.
Mix together all the dry ingredients in a bowl, if you want to sprinkle some sugar on top reserve about 1 tablespoon.
Add your remaining liquid ingredients to the milk mixture. DO NOT mix the liquid into the dry until the pan and oven are preheated.
Once your pan is well preheated, remove from the oven and add your 1 tablespoon oil. Spread around CAREFULLY with a heat resistant spatula.
Now you may mix the dry and the wet together, try to remove all lumps. Once your mixture is smooth pour it into your pan. Scrape the bowl out and smooth the mixture in the pan if needed.
Bake for 25-40 minutes or until a toothpick inserted in the center comes out clean. For me this takes 25 minutes but in my old apartment is took 40, so use a toothpick please!
Let cool for 10 minutes. Slice into 8 pieces and serve with butter and honey, yummy!
Notes
I suggest using less sugar for normal cornbread, unless you intend on it being dessert style. If this is the case add more and also include ½ - 1 tablespoon REAL vanilla extract. For a yummy texture, take one tablespoon of your sugar and set to the side. When you poor your batter in the pan, sprinkle it on top.
If you would like to get your own snack box for free, all you pay is $2 shipping. Click HERE or go to: http://lovewithfood.com/invite?m=r&ref=213t . Full disclosure: If you do use my link I will get 500 points for merchandise in the future. This is no gimmick, if you don’t like the box just cancel your subscription. It’s super easy. =)
I was SOO looking forward to my love with food box. I didn’t peek this time so my honest reactions are seen in the video. Some things I’m really excited about and some things not so much. For the most part the items are healthy, but the Mac n’ Cheese chips have yeast extract in them, which is msg basically, I will survive though! Here is a list of all I received in the deluxe 2015 box:
2 packets Dark Chocolate Cacao Nibs by BRITT
2 Chocolate Dipping coconut Mini bars by LUNA
1 packet Energy Kettle Cooked Apples by Big Slice
2 packets Somersaults by Somersault Snack Company
1 package Chocolate Chip Oatmeal Bliss Ginnyminnis by GinnyBakes
1 packet My Super Cookies, blueberry flavor. By Super Foods Co
2 tea bags – Breakfast in Paris Black Tea by Stash
2 packages Cassava Pops by Wai Lana
2 Velvet Truffles by Alter Eco
1 Black Truffle by Alter Eco
1 packet Crunchy Mac N’ Cheese by Eatrageous
2 packages of In-shell Almonds by Bobalu (not onions haha!)
19 items!! AWESOME!
Also got several coupons AND a gift card to hellofresh.com and a gift card to urban remedy!
ps.. I ate 1 of the velvet truffles while editing all of this, OMG! sinful!
I also just noticed that all but two of the choices (cacao nibs and super cookies) were actually gluten free. Love with food does offer a gluten free box but it costs more. This box was worth the money I think.
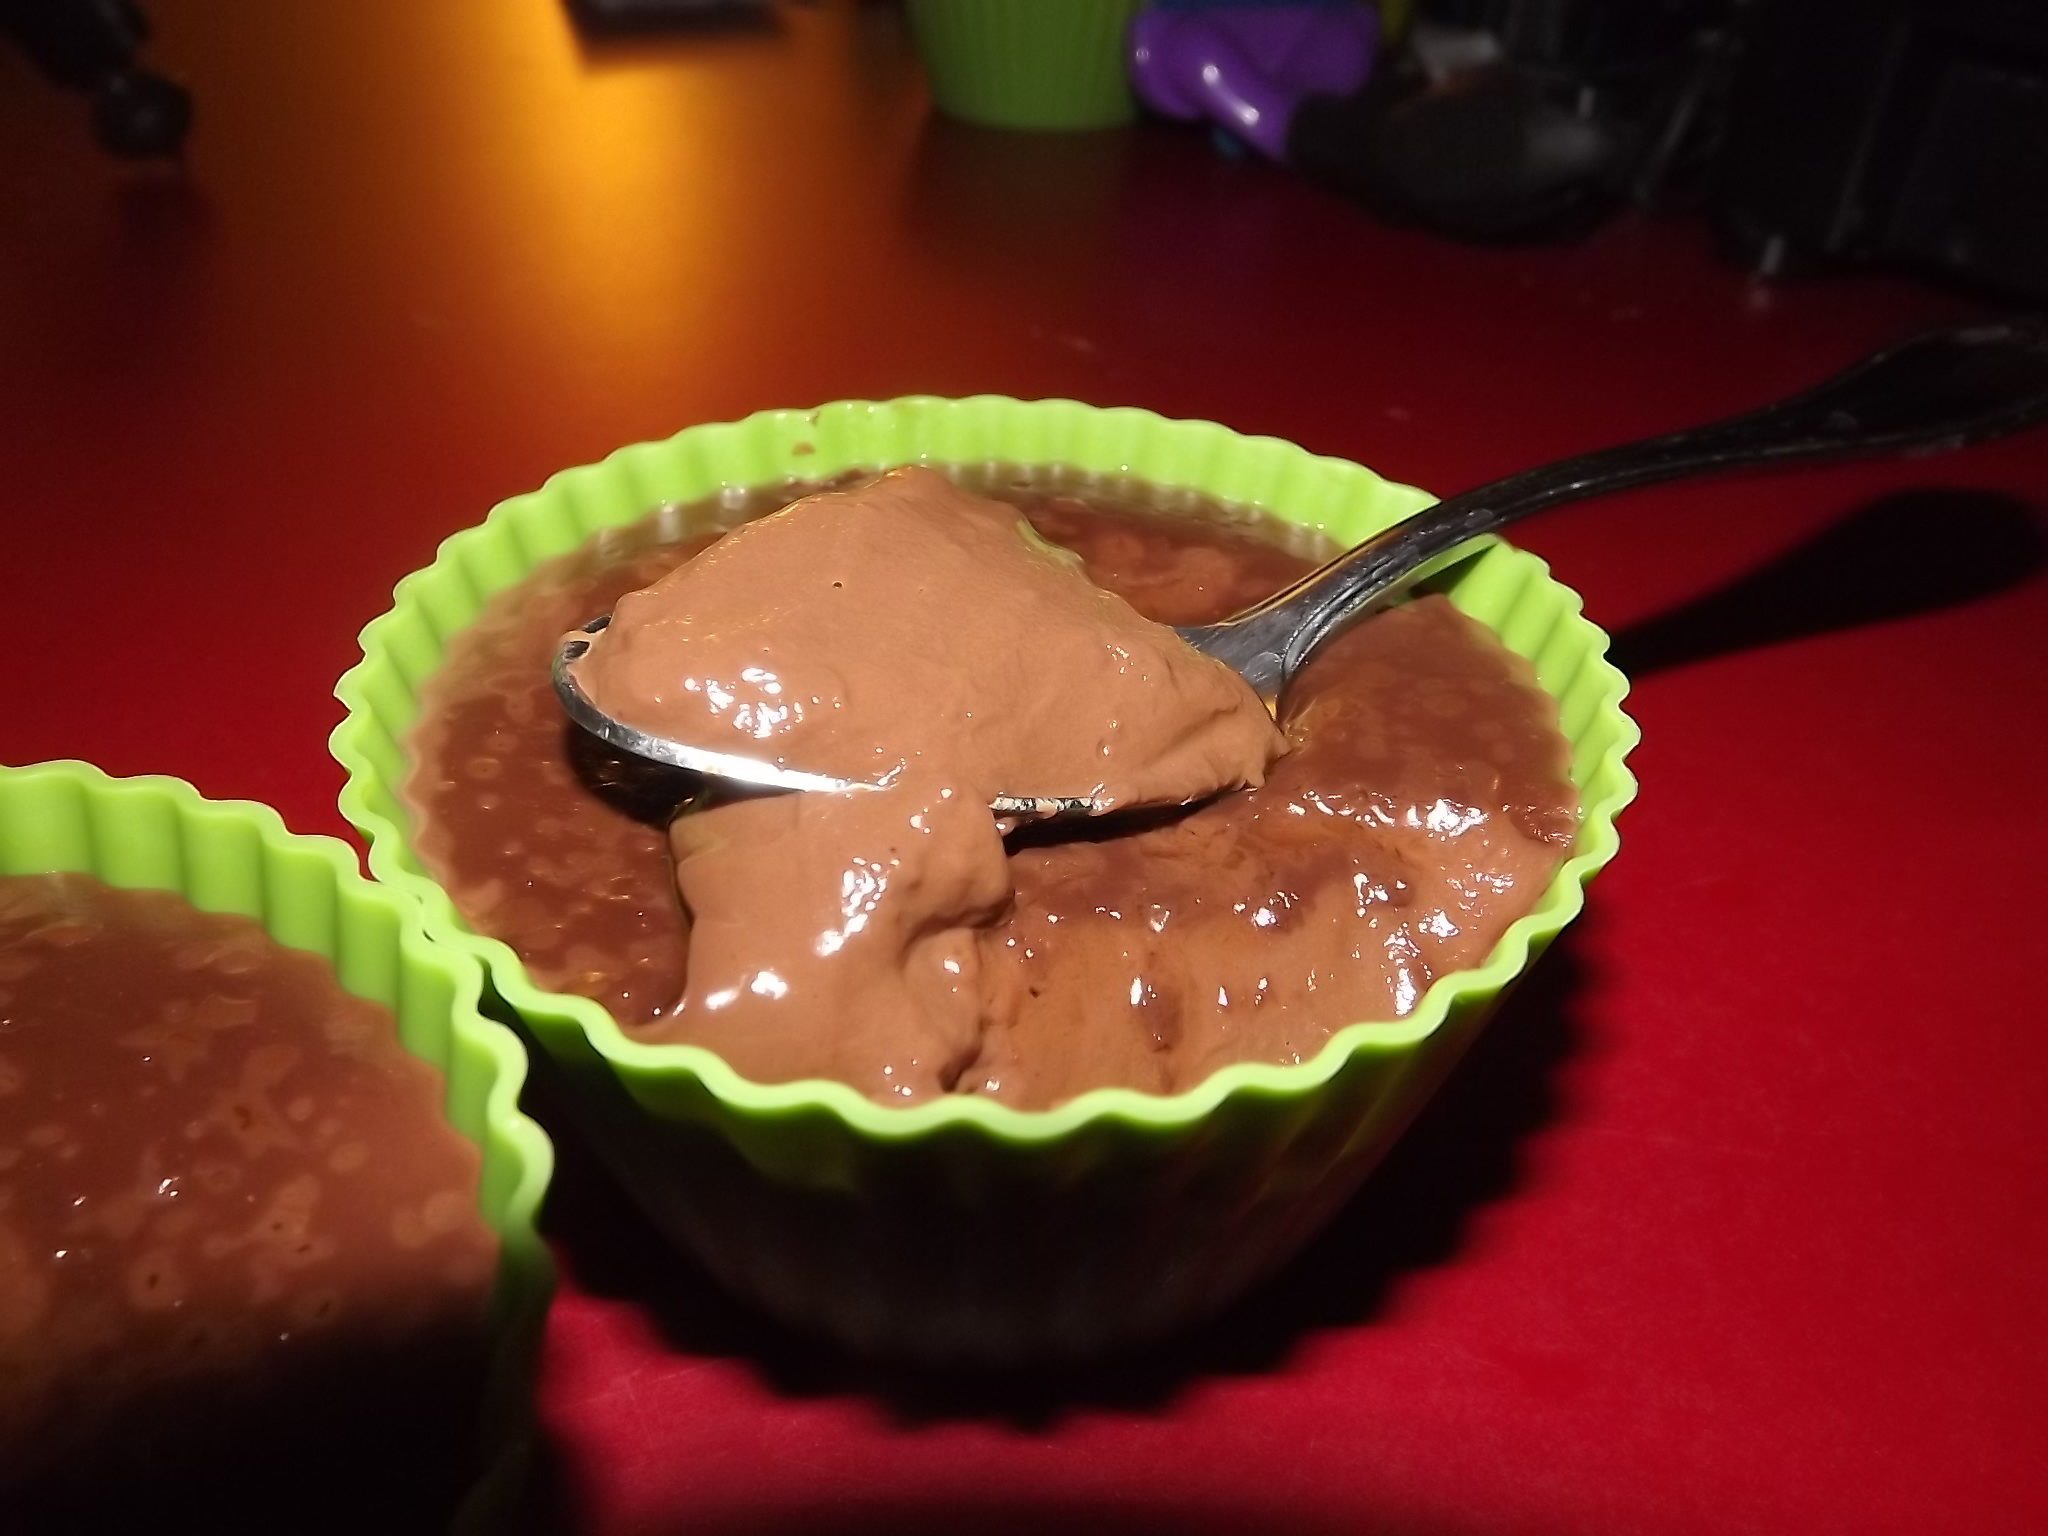
Quick, simple, and EASY homemade chocolate pudding is so good you'll NEVER buy the pudding pots again. I promise! This can be made vegan simply by replacing dairy milk with nondairy. I suggest coconut milk for a good rich flavor or almond milk for something a little more light.
Author: FaylinaMeir
Recipe type: Dessert
Cuisine: American
Serves: 4 servings
Ingredients
2 cups milk
100g or 3.5 ounces dark chocolate
3 tablespoons sugar - you can use no sugar or you can use more, up to you!
1 tablespoon potato starch + 1 tablespoon water mixed together
optional: salt and thick sugar for the toppings
Instructions
Over medium high heat add your sugar and chocolate pieces into a pan. Make sure you break up the chocolate bar for quicker melting. Stir constantly with a whisk so it does not burn. Continue until all the sugar is dissolved and you don't hear "crunching" anymore.
Slowly add in your milk, if it looks ugly don't worry. As the chocolate remelts it'll come together. Once it's all melted try your mixture. If you need to add more sugar now is the time to do it!
When you have it sweetened to your liking and all the chocolate is mixed with the milk add in your starch a little at a time. If you add it all at once you might cause lumps.
Keep in mind that if you are eating this hot you might need to add extra starch. If you are going to chill in the fridge the mixture will firm up so don't over thicken it.
Divide the mixture into however many servings you want, you can make 4 good portions with this recipe.
If you want to add the sugar and salt do that now. A little goes a long way with this so be careful.
Chill in the fridge until firm and cold. This will take around 4 hours. Enjoy!
Notes
-If you are making this vegan or nondairy make sure the chocolate bar you used does not contain milk. -Try to use at least 75% dark chocolate, I used 90% cocoa by Lindt. -You can use cornstarch or tapioca instead of potato starch. -Pro tip; use martini or wine glasses to make the pudding more elegant!