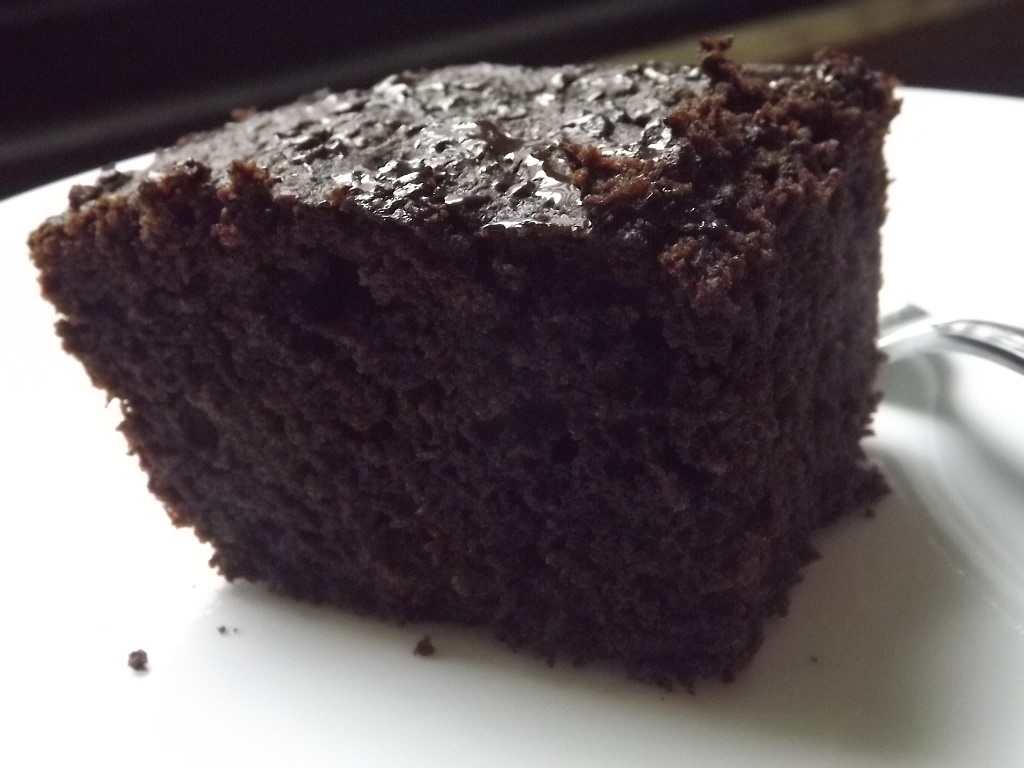
I got this craving for a brownie so I went to the kitchen and threw stuff together and it worked! That is literally how this came to be.
Author: FaylinaMeir
Serves: 6 pieces
Ingredients
½ cup Coconut Flour
¼ cup Tapioca Starch
¼ cup Toasted Carob Powder (or ¼ cup cocoa powder)
½ tsp, Baking soda
1 tsp Baking Powder Aluminum Free & Double Acting
3 eggs
¼ cup plus 2 tablespoons Coconut Milk
¼ cup Honey
1 tsp Pure Vanilla Extract
2 tsp apple cider vinegar
2 tablespoons Coconut Oil
Instructions
Preheat your oven to 350f (175c).
In a large bowl mix together your eggs and honey until well combined. Then add your apple cider vinegar, vanilla, coconut milk, and coconut oil. Don't worry if your coconut oil forms little solid pieces, this is actually what you want because when the brownie bakes it makes these yummy little pockets. Make sure you whisk this together very well, you don't want the oil chunks very large.
In another bowl, mix the rest of your ingredients together well. You don't want any lumps.
Grease your baking container well; I used a glass loaf pan. Don't use a large pan if you want these to be taller. Once your oven is well preheated, mix your dry ingredients into your wet ingredients and whisk til there are no lumps. Scrape your batter into your container and even it out.
Bake in the middle of your oven for 25-35 minutes (see notes). I like my brownies well done so I went the full 35 minutes. A toothpick inserted into the middle will come out clean. Let cool in the pan for at east 10 minutes. Serve warm, and try some butter on top, it tastes amazing!
Notes
If you want more fudgy/gooey brownies only bake it about 80% done, about 25 minutes. A toothpick will come out almost clean and might be a little jiggly in the middle. Let cool at least 20 minutes.
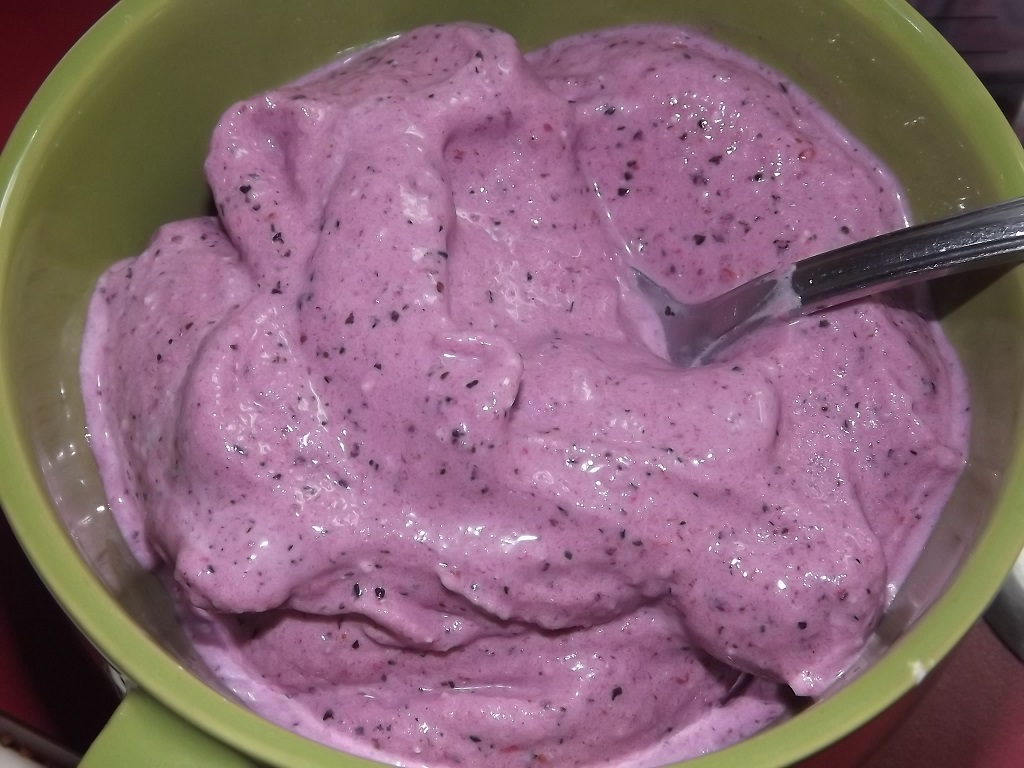
This ice cream recipe is very versitile and yummy! It's Dairy Free, Vegan, Paleo / Primal friend AND is no sugar added.
Author: FaylinaMeir
Serves: 1 serving
Ingredients
⅓ cup coconut cream or ½ cup coconut milk
⅔ cup water (or ½ cup water if using coconut milk)
100g banana, frozen
40g blueberries, frozen
20g raspberries, frozen
90g strawberries, frozen
½ teaspoon vanilla extract
Equipment
A high speed blender like a Vitamix OR a decent food processor
Instructions
Add your coconut cream (or milk) to your blender, add enough water to equal 1 cup of liquid. Add in the rest of your ingredients.
Blend on medium speed using plunger if needed (or scrap the sides down if your blender doesn't use a plunger). If using a food processor, pulse several times, scraping down the sides as needed. Blend until creamy and smooth.
Serve immediately or you can stick this in the freeze for 30 minutes to firm up more if desired.
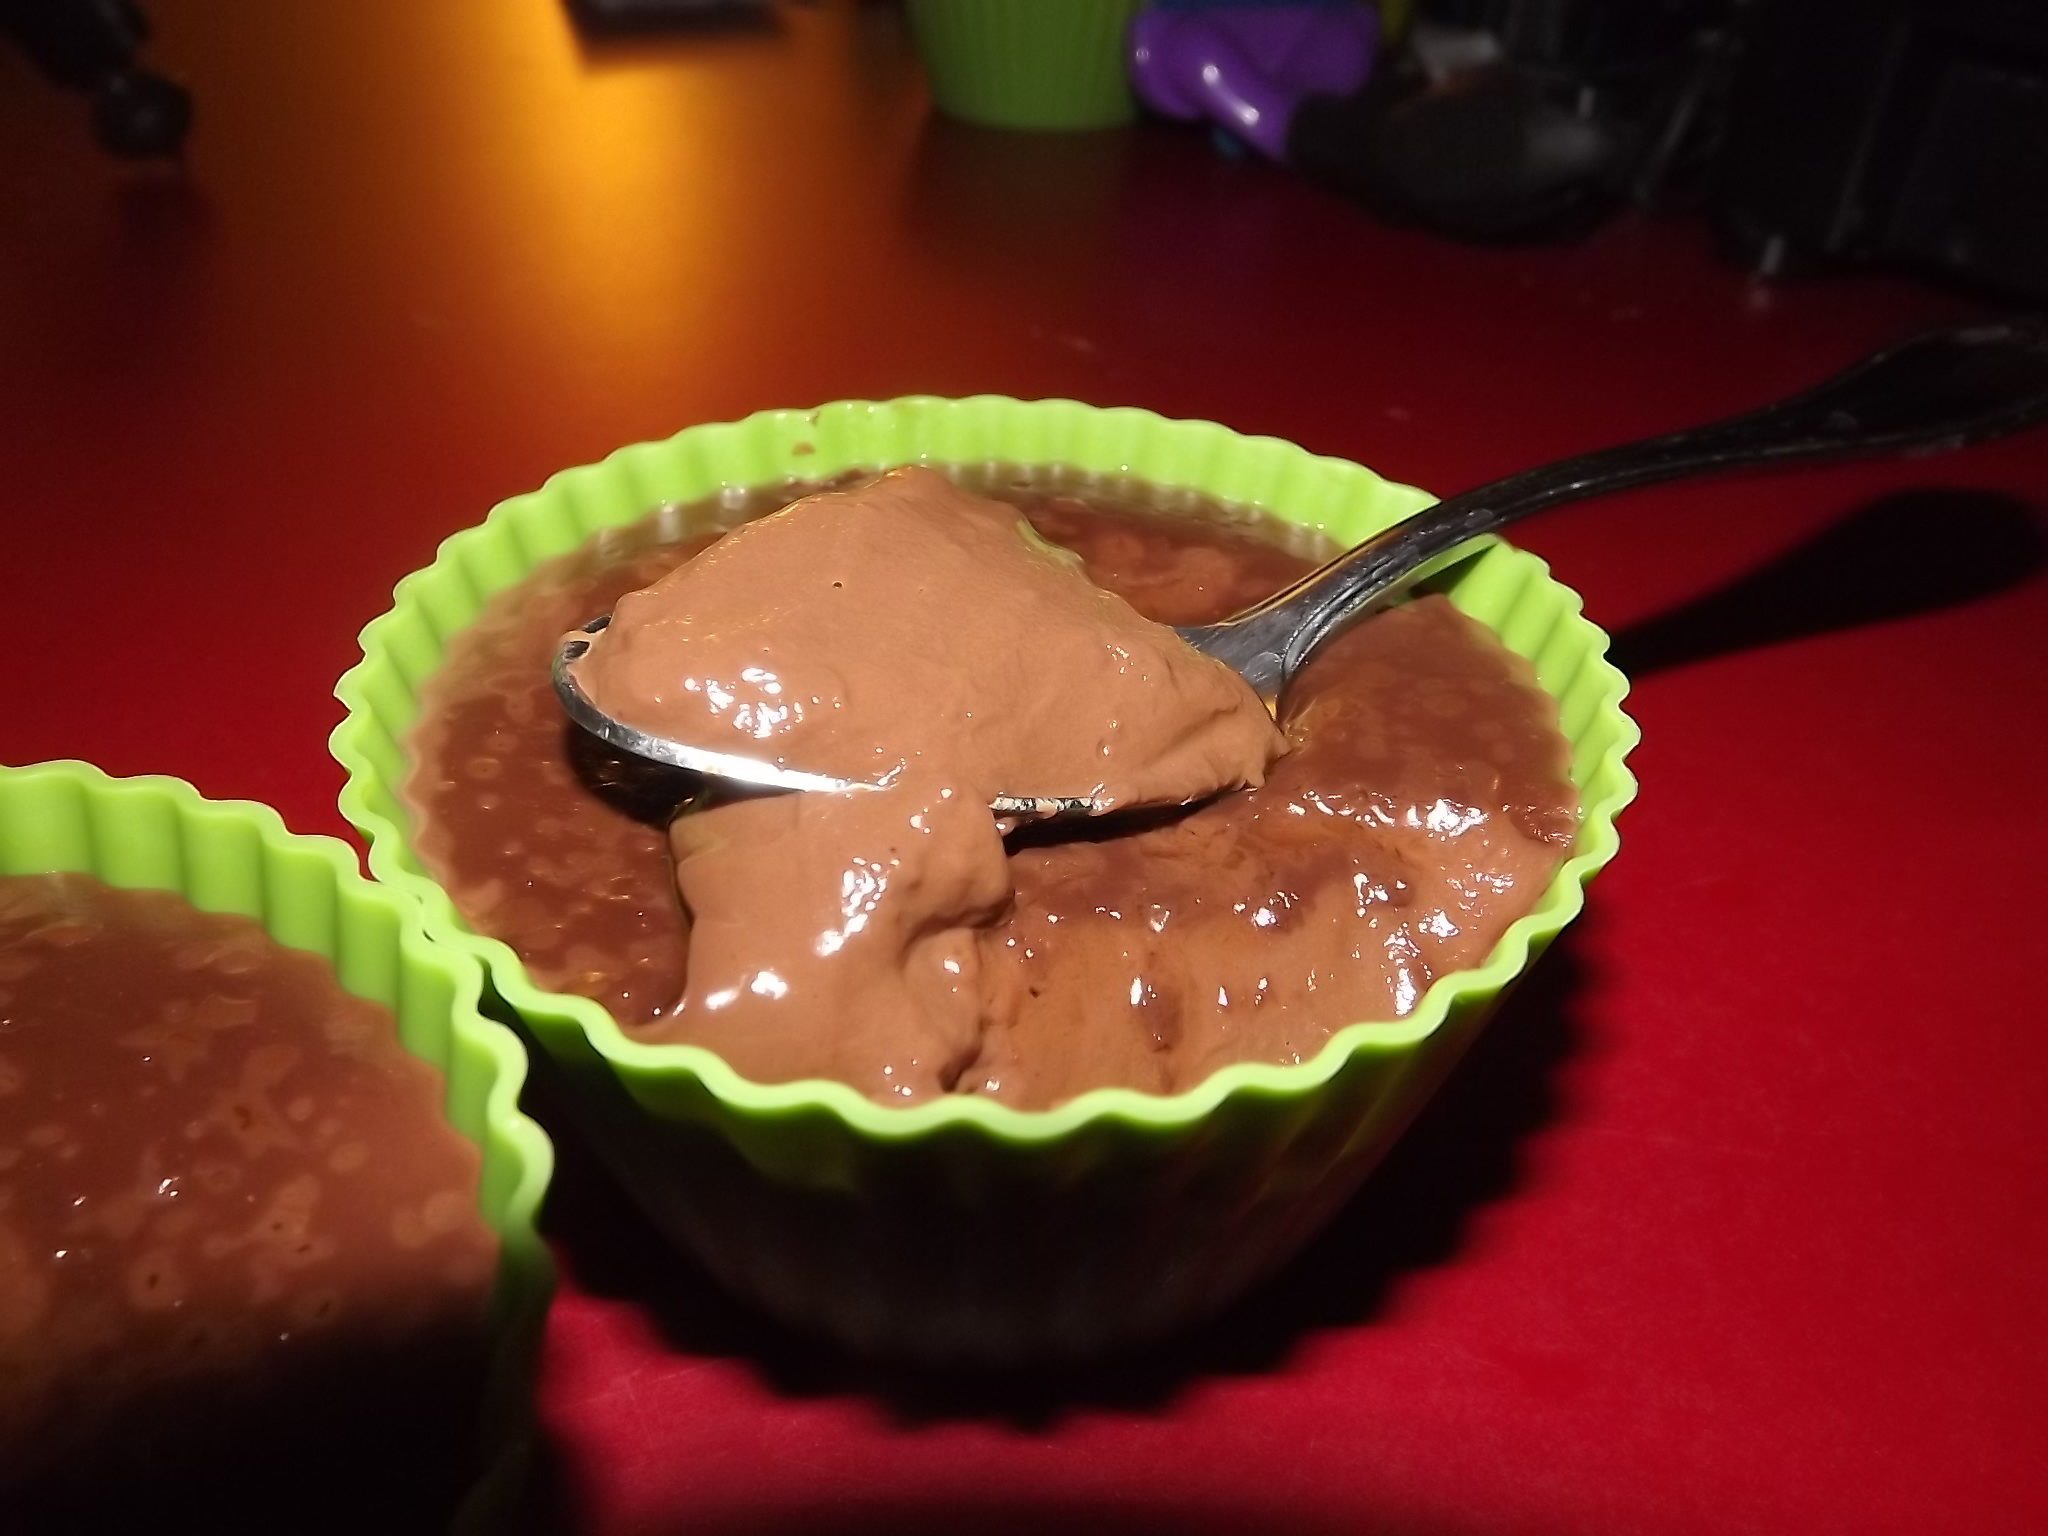
Quick, simple, and EASY homemade chocolate pudding is so good you'll NEVER buy the pudding pots again. I promise! This can be made vegan simply by replacing dairy milk with nondairy. I suggest coconut milk for a good rich flavor or almond milk for something a little more light.
Author: FaylinaMeir
Recipe type: Dessert
Cuisine: American
Serves: 4 servings
Ingredients
2 cups milk
100g or 3.5 ounces dark chocolate
3 tablespoons sugar - you can use no sugar or you can use more, up to you!
1 tablespoon potato starch + 1 tablespoon water mixed together
optional: salt and thick sugar for the toppings
Instructions
Over medium high heat add your sugar and chocolate pieces into a pan. Make sure you break up the chocolate bar for quicker melting. Stir constantly with a whisk so it does not burn. Continue until all the sugar is dissolved and you don't hear "crunching" anymore.
Slowly add in your milk, if it looks ugly don't worry. As the chocolate remelts it'll come together. Once it's all melted try your mixture. If you need to add more sugar now is the time to do it!
When you have it sweetened to your liking and all the chocolate is mixed with the milk add in your starch a little at a time. If you add it all at once you might cause lumps.
Keep in mind that if you are eating this hot you might need to add extra starch. If you are going to chill in the fridge the mixture will firm up so don't over thicken it.
Divide the mixture into however many servings you want, you can make 4 good portions with this recipe.
If you want to add the sugar and salt do that now. A little goes a long way with this so be careful.
Chill in the fridge until firm and cold. This will take around 4 hours. Enjoy!
Notes
-If you are making this vegan or nondairy make sure the chocolate bar you used does not contain milk. -Try to use at least 75% dark chocolate, I used 90% cocoa by Lindt. -You can use cornstarch or tapioca instead of potato starch. -Pro tip; use martini or wine glasses to make the pudding more elegant!
1 teaspoon molasses (optional but makes it more chewy)
1 tablespoon vanilla extract, only the real stuff please
2 tablespoons neutral oil, I used coconut
½ cup unsweetened applesauce
1 unpacked cup raisins***
Instructions
Preheat to 350°F or 175°C.
This step is optional but if you want softer raisins I would advise it. Mix all your liquid ingredients (minus the egg) and let it soak for 20-60 minutes. You can go overnight but they get really soft and I dislike that. I did mine for only 10 minutes and that was good for me.
Next mix all your dry ingredients in your bowl and then add your raisin mixture and egg. Use a spatula to mix (or a spoon) thoroughly. It is a thicker batter so don't be alarmed.
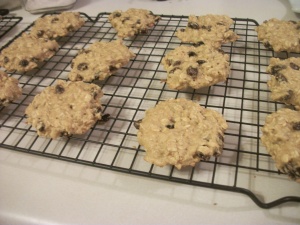
Line your cookie tray with parchment paper or a silicone baking mat. Spoon out a rounded tablespoon per cookie and squish them down. These cookies will rise slightly but will not spread outward. I suggest no more than 12 per tray.
Bake these cookies for 12 minutes and move to a wire rack to cool. They get chewier as they cool.
Notes
Variations: * : You can use all whole wheat flour or all all purpose flour it's a person preference. Whole wheat flour will make the cookies more dense. I would do no more than ½ and ½ but that is me. ** : You can use all sugar or you can skip the sugar and just use maple syrup (or honey). Brown sugar would be best but I used evaporated cane sugar and molasses. *** : You can substitute raisins for any dried fruit to mix this up. Try blueberries and craisins, Delicious!
One thing I want to note, I left this recipe up because some people genuinely enjoy it, BUT this recipe is VERY high in salt. Please try out one of my other pancake recipes if you cannot eat a lot of salt. Personally I don’t use this recipe anymore because the pancakes would come out kinda salty.
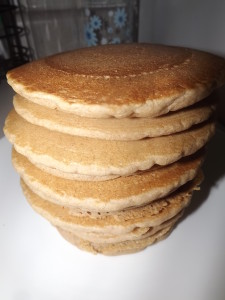
So I already have a couple pancake recipes on this website but I doubt one more would hurt! This is a slightly edited version of the recipe found in The Happy Herbivore Cookbook: Over 175 Delicious Fat-Free and Low-Fat Vegan Recipes. While the original recipe is really good I found with a few minor adjustments you can change it up and make it even better. Make sure to try it out with my Blueberry Maple Syrup recipe, it was one of the best breakfasts I'd had in along time!
Author: FaylinaMeir
Serves: 6 pancakes
Ingredients
1 cup whole wheat flour
1 cup whole wheat All Purpose flour (see variation note)
2 cups warm water
¼ cup maple syrup
1½ tablespoons baking powder pinch salt
1 tablespoon vinegar
1 teaspoon cinnamon
1 tablespoon rice flour (or extra wheat flour for thickening)
Instructions
Get your pan preheating over medium heat. You will want a good nonstick pan for this since there is no extra oils added, if you don't have that then get your best nonstick and a SMALL amount of oil spray.
In a mixing bowl, add your flours (minus rice flour), baking powder, pinch of salt, and cinnamon. Stir well to combine. In a smaller bowl (or mason jar) add your water, vinegar, and maple syrup. Stir to combine. Add the wet ingredients to the dry ingredients and mix well with a whisk. You do not want any clumps of flour mixture remaining. If your batter seems loose add 1 tablespoon of rice flour, or wheat flour, and set aside for 5-10 minutes. You don't have to let the batter set but as I was making these I noticed the 3 and 4th pancake turned out better than the beginning.
Add ¼ cup of batter to your pan at a time and cook for about 2 minutes. You know it's time to flip when the pancakes are all bubbly onto and the edges are cooked. Cook for 1-2 minutes on the second side and serve warm. These will last in the fridge for about 3-5 days if tightly wrapped but I doubt they will last that long!
Notes
VARIATIONS (as seen in photo) : the variation I made was I used ¾ cup whole wheat all-purpose flour, ¼ cup kaput flour, and 1 cup whole wheat flour. This is not required as Kamut is a variation of wheat but it has great flavor and nutrition. If you can find it make sure to store it in the freezer with your whole wheat flour for best nutrition retention. Any other gluten containing flour could be used instead of kamut, Rye for instances would be a great addition.