Side Dish; if the recipe is great but not as a main meal, you’ll find it here. Really though, ANY dish could be a side dish so try to narrow it down more.
Making kimchi is a really easy thing to do. I know it seems daunting, but I promise, you'll love the end result! Best of all this recipe is vegan, but easily made more traditional. If you use gluten free tamari, it's also suitable for those with gluten allergies.
Author: FaylinaMeir
Serves: 10 servings
Ingredients
2.2lbs (1 kilo) napa cabbage
¼ cup coarse sea salt (for salting)
300g daikon radish (or Korean radish)
1 medium or 2 small carrots
8 green onions
porridge
2 cups water
2 tablespoons sweet rice flour
¼ cup soy sauce or fish sauce
½ cup to 1½ cups red pepper powder
1 tablespoon sugar, optional
2 generous tablespoons ginger, peeled (about a 1½ by 1 inch piece)
8 cloves garlic
½ sweet apple or ½ korean pear or 1 small pear
supplies
1 jar glass jar with tight fitting lid
sauce pan & whisk
blender or stick blender
gloves, HIGHLY suggested for mixing
Instructions
You need to start out by salting the cabbage. This step is easy I promise. Follow along with the video. Cut the cabbage head into 4 pieces like shown and rinse under cold water. Shake the excess water off, and sprinkle salt into each leaf. Don't skip this step, if you don't salt it well enough the end result isn't very good! Leave the cabbage in a glass bowl to set.
After 1 hour, toss the cabbage over, put any larger and thicker pieces towards the bottom. If you want you can spoon over the juice to help soak better.
After another hour (2 hours total) check the cabbage, it shouldn't be gooey but softened. If you taste a piece it will have a slight crunch, but slightly salty.
Rinse the cabbage 2-3 times under cold water. Make sure to rinse off each leaf. You don't want excess salt in your kimchi.
Set the cabbage in a strainer to dry out some while you prepare the porridge.
Add 2 cups of cool water to a saucepan, and whisk together 2 tablespoons of sweet rice flour (often called mochiko because of the brand name). Make sure you remove ALL lumps before you turn the heat on. Turn to medium high and do NOT stop whisking. Once you notice the mixture starting to thicken, reduce heat to medium and cook it for about 2 minutes. It's very important to keep mixing to prevent lumps.
After 2 minutes, shut off the heat and stir in your sugar, soy sauce (or fish sauce), and red pepper powder. Then transfer to a blender jar. If you had an immersion blender (stick blender) this would work better.
Add your mixture to blender along with your ½ apple or pear, garlic, and ginger that you have peeled. Blend on high until all the ginger and garlic are mixed in.
Let this mixture cool to around body temperature. Don't skip this step or you'll cook the cabbage.
Once the mixture is cooled, mix together with the carrot, green onion, and daikon (or Korean) radish. As shown in the video, spread a little mixture onto each leaf and outside of the cabbage. Put into, preferably, a glass jar with a tight fitting lid. An old pickle jar would work great for this. Pack it down and you're done.
Let this sit at room temperature overnight, up to 2 days depending on the season. You want it to smell a little sour and you'll see bubbles from the bacteria in the cabbage. Transfer to your fridge and it'll be good for weeks, couple months even.
Obviously you can eat it right after making it, but after 2 days is better. The juice can be used for soups or pancakes and the longer the kimchi sits in the fridge the more sour it tastes. We love it!
Notes
If you want more traditional kimchi, replace the soy sauce with fish sauce. Also if you are making this for someone who is allergic to gluten PLEASE make sure the tamari you use is certified gluten free!! I cannot stress this enough!
Do NOT use table salt for salting the cabbage, you will end up with gooey cabbage.
The apple/pear is optional but adds a yummy mellow flavor to the kimchi. The sugar is also optional, but if you're a baby with spice like I am, it really makes a difference.
You can add as much or as little red pepper powder as you want. I don't like it very spicy so I added ½ cup, but you can add 1½ cups if you like it very spicy!
Cornbread can be made quickly, simply, and without a lot of fuss. Importantly it tastes AMAZING. Low calorie is a plus!
Author: FaylinaMeir
Serves: 8 slices
Ingredients
1 cup cornmeal
1 cup whole wheat flour
1 cup milk
1 tablespoon vinegar
1 large egg
½ cup water
½ cup unsweetened applesauce
1 tablespoon oil for batter, can also use melted butter
1 tablespoon oil for greasing pan
¼ to 1 cup of sugar (see notes)
1 tablespoon baking powder
½ teaspoon baking soda
Instructions
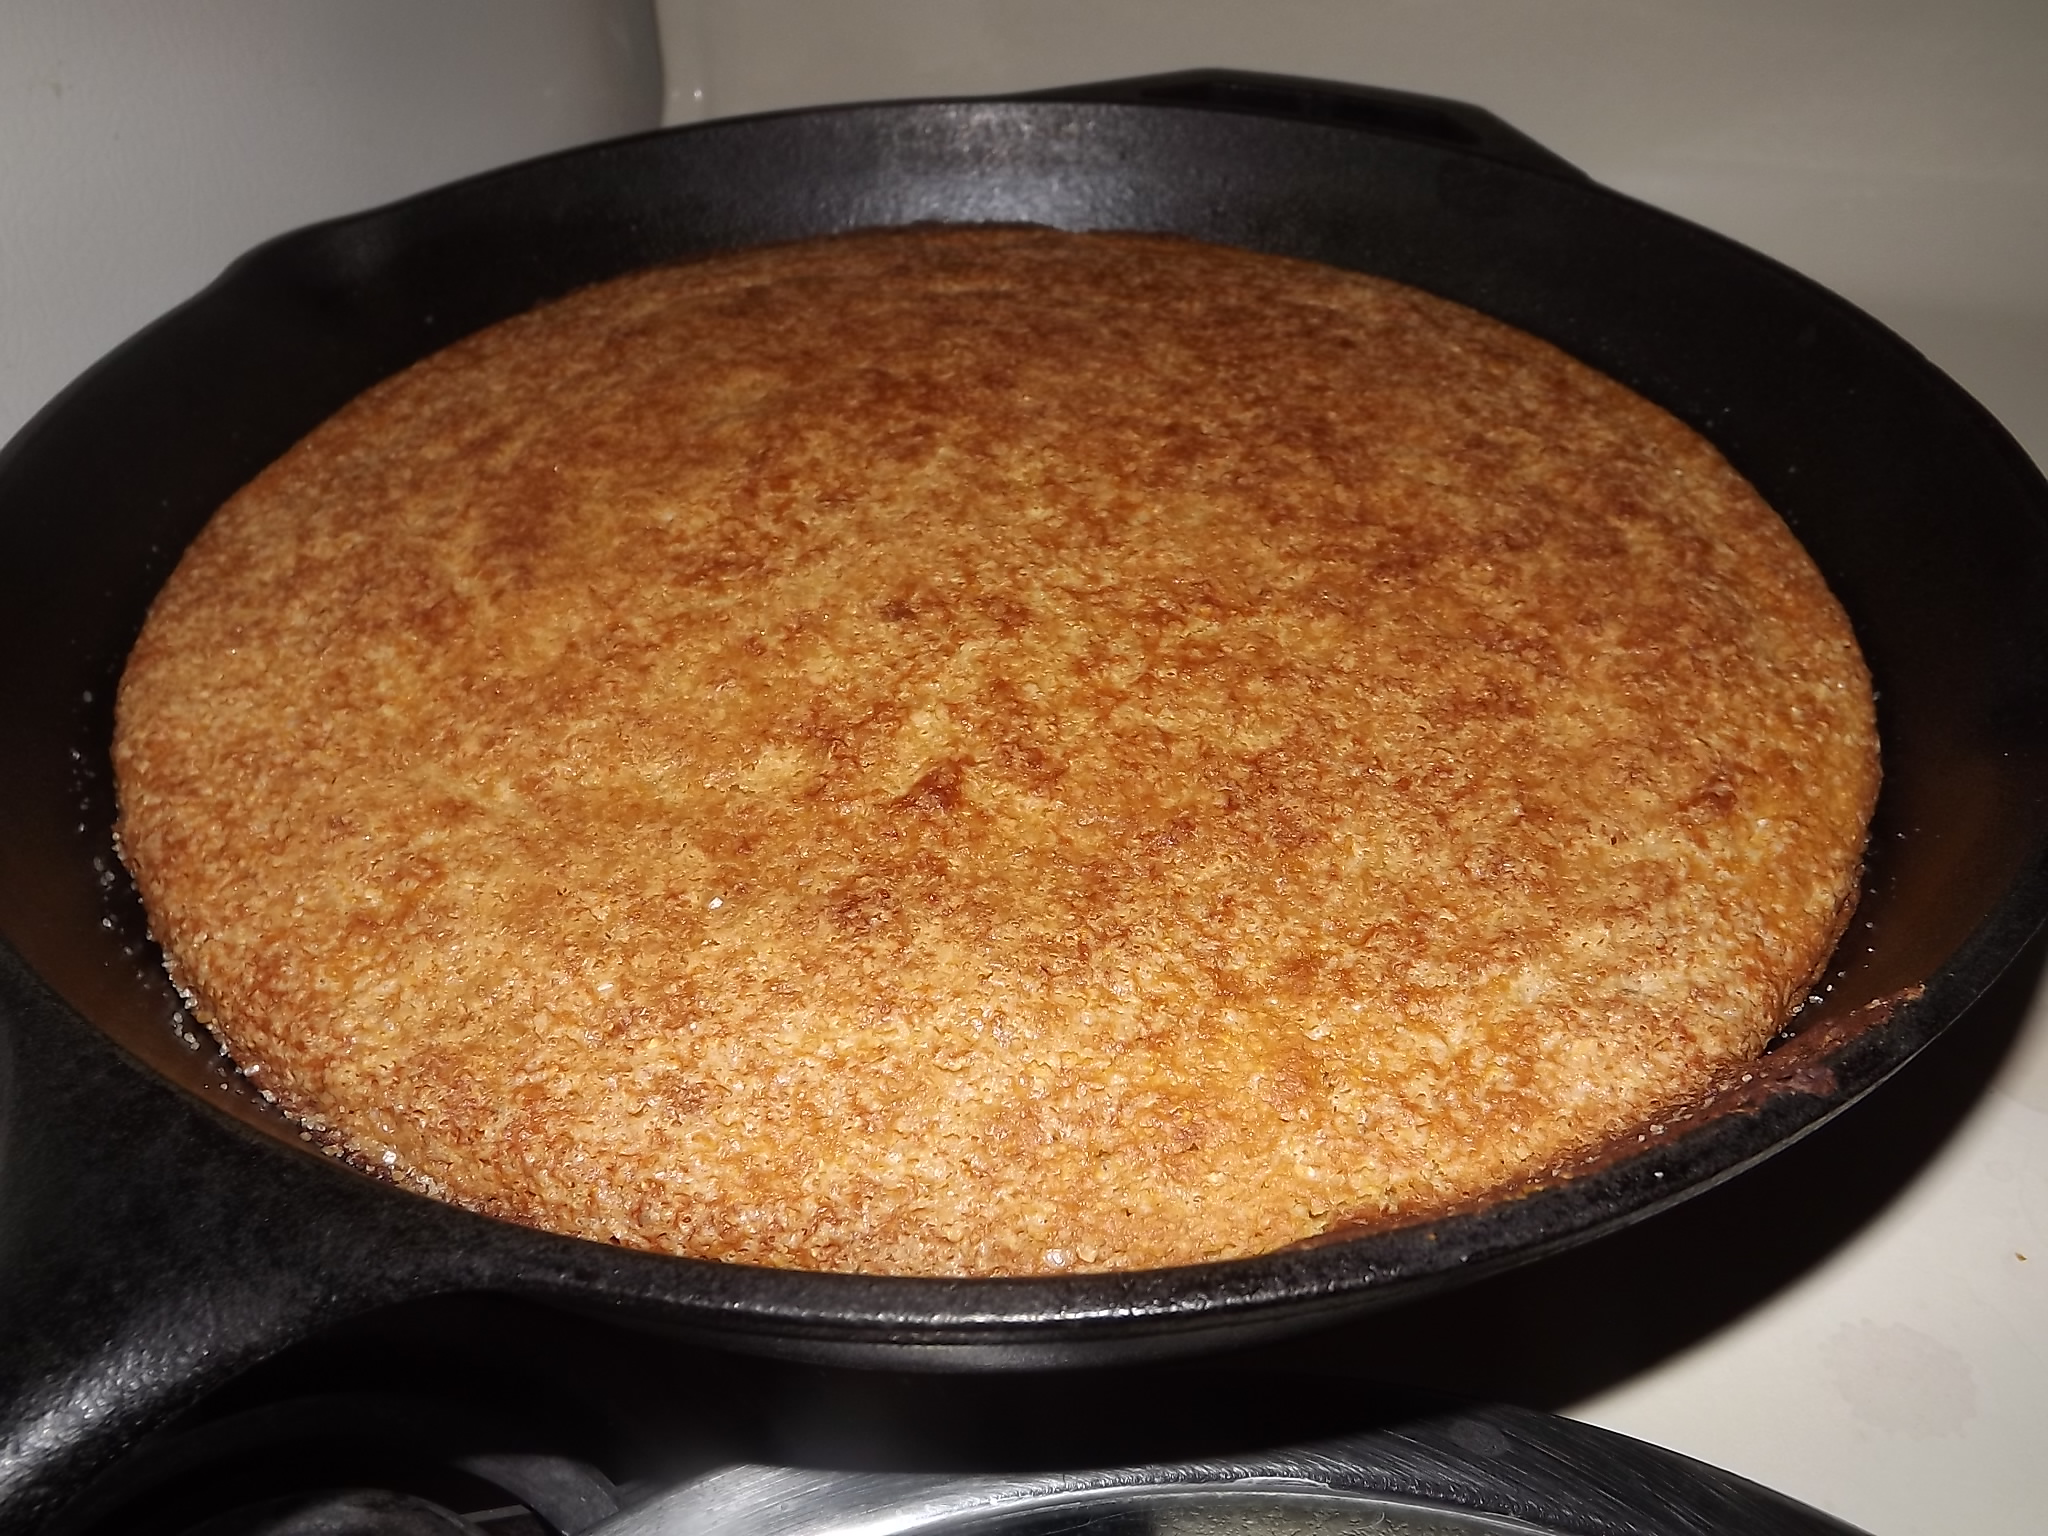
Preheat your oven to 400 degrees Fahrenheit, this is approx 200 Celsius. If you are using a cast iron skillet, and you SHOULD, put that in to preheat as well.
Add your milk and vinegar into a bowl on the side and let this set for a few minutes, this makes faux buttermilk. If you want you can just use buttermilk instead without the vinegar.
Mix together all the dry ingredients in a bowl, if you want to sprinkle some sugar on top reserve about 1 tablespoon.
Add your remaining liquid ingredients to the milk mixture. DO NOT mix the liquid into the dry until the pan and oven are preheated.
Once your pan is well preheated, remove from the oven and add your 1 tablespoon oil. Spread around CAREFULLY with a heat resistant spatula.
Now you may mix the dry and the wet together, try to remove all lumps. Once your mixture is smooth pour it into your pan. Scrape the bowl out and smooth the mixture in the pan if needed.
Bake for 25-40 minutes or until a toothpick inserted in the center comes out clean. For me this takes 25 minutes but in my old apartment is took 40, so use a toothpick please!
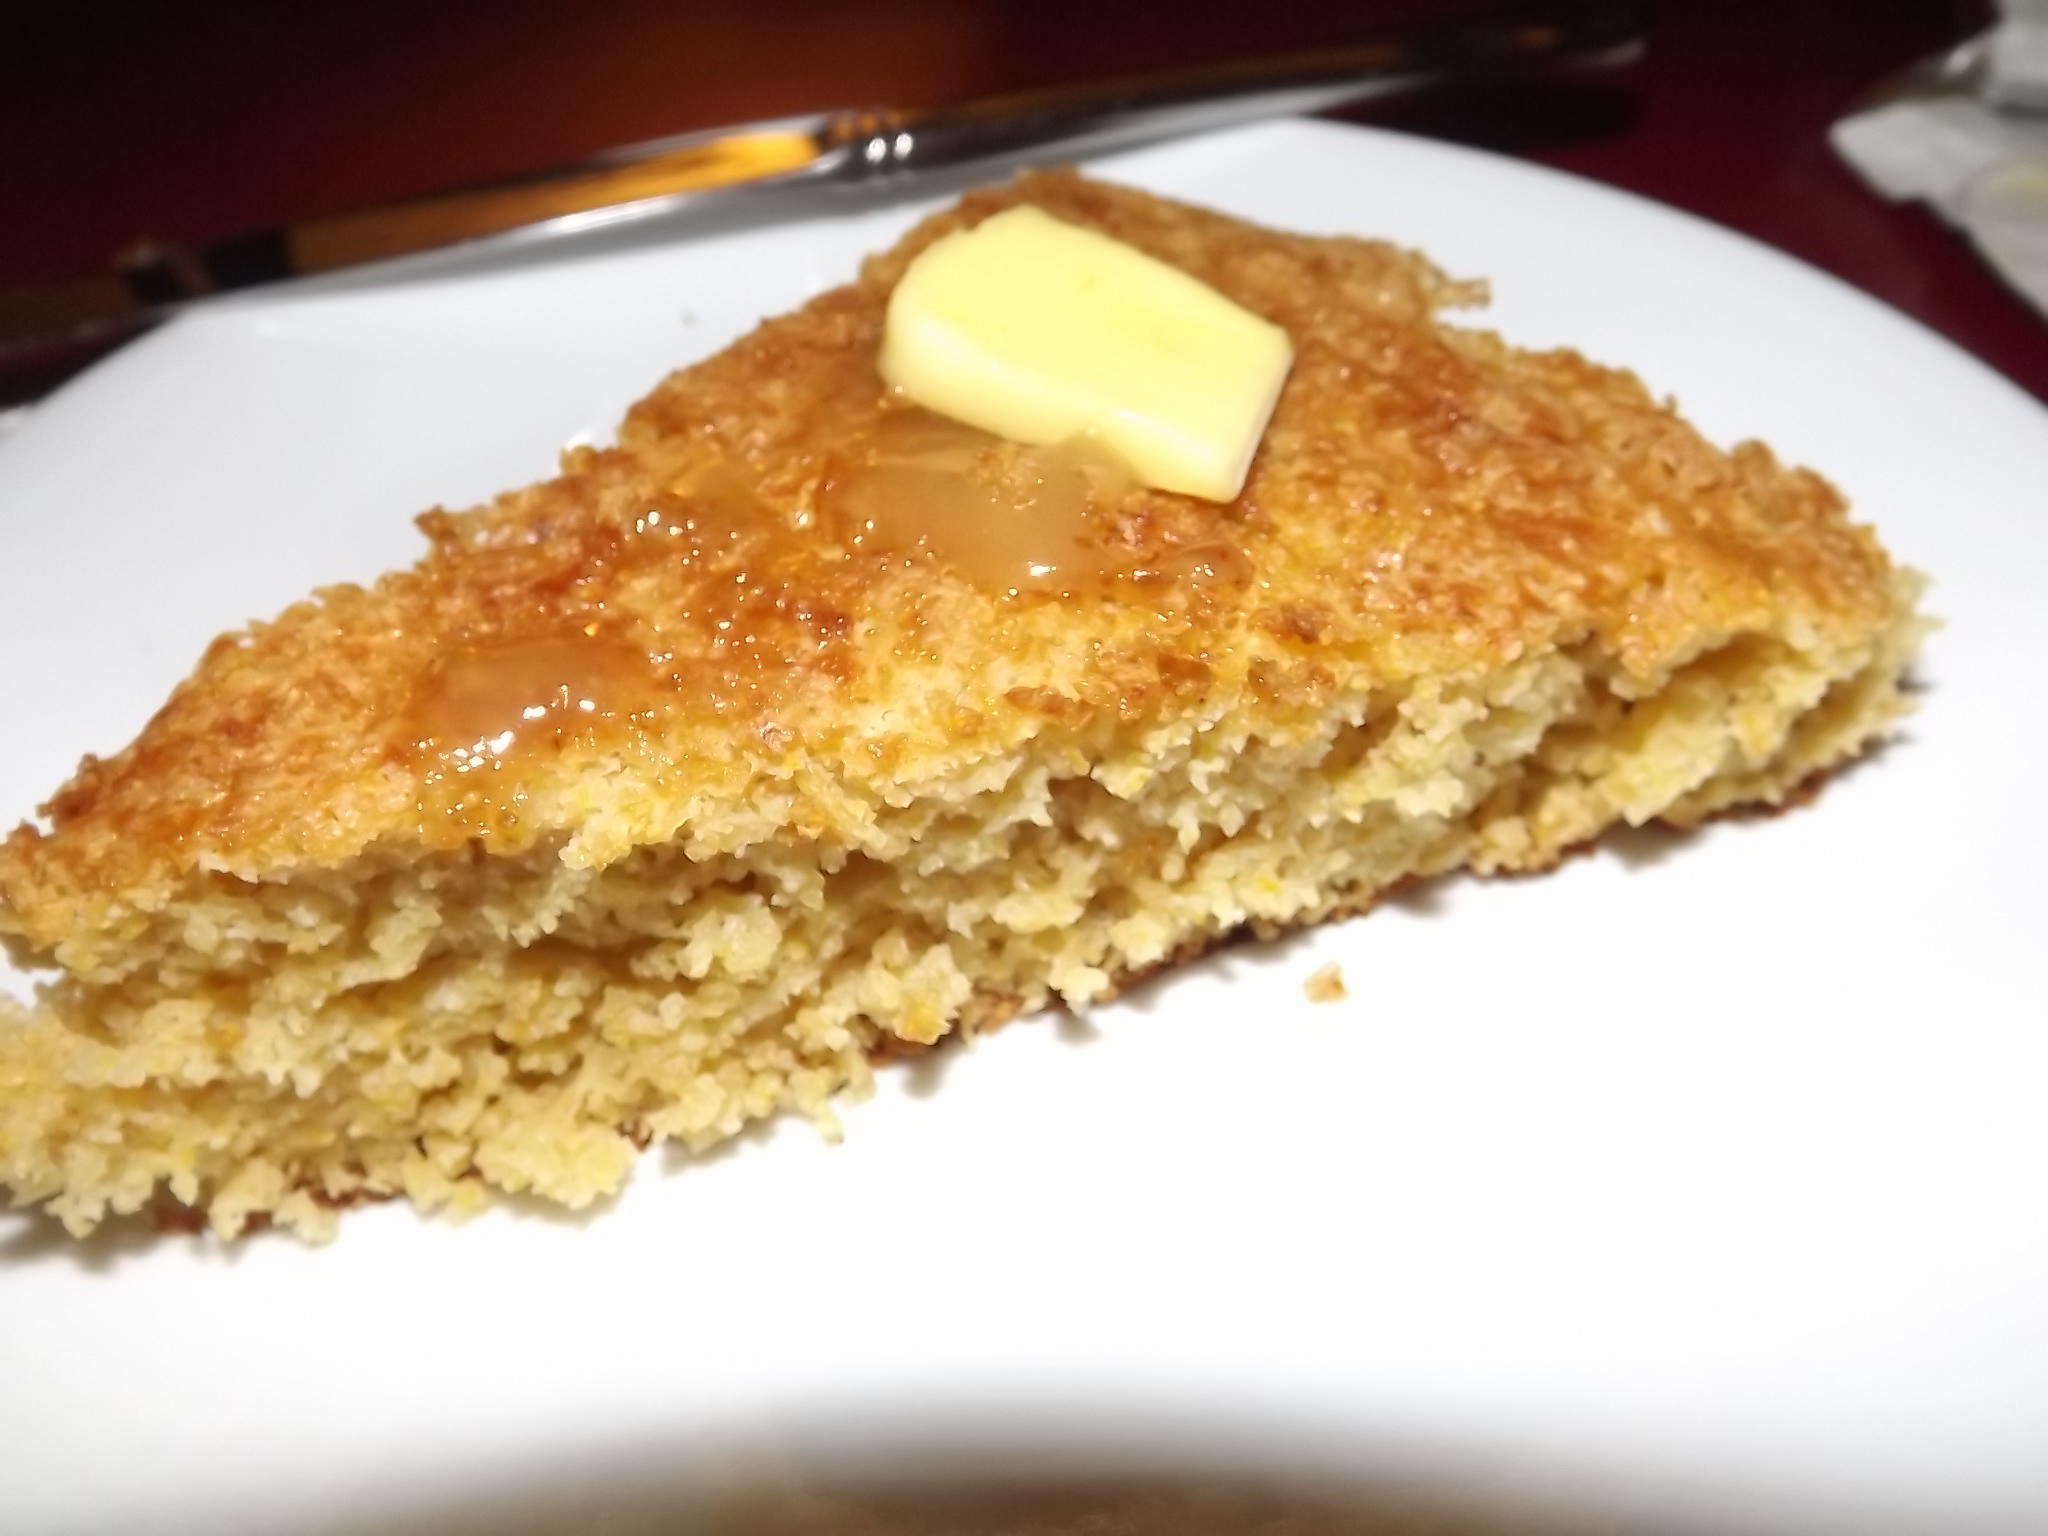
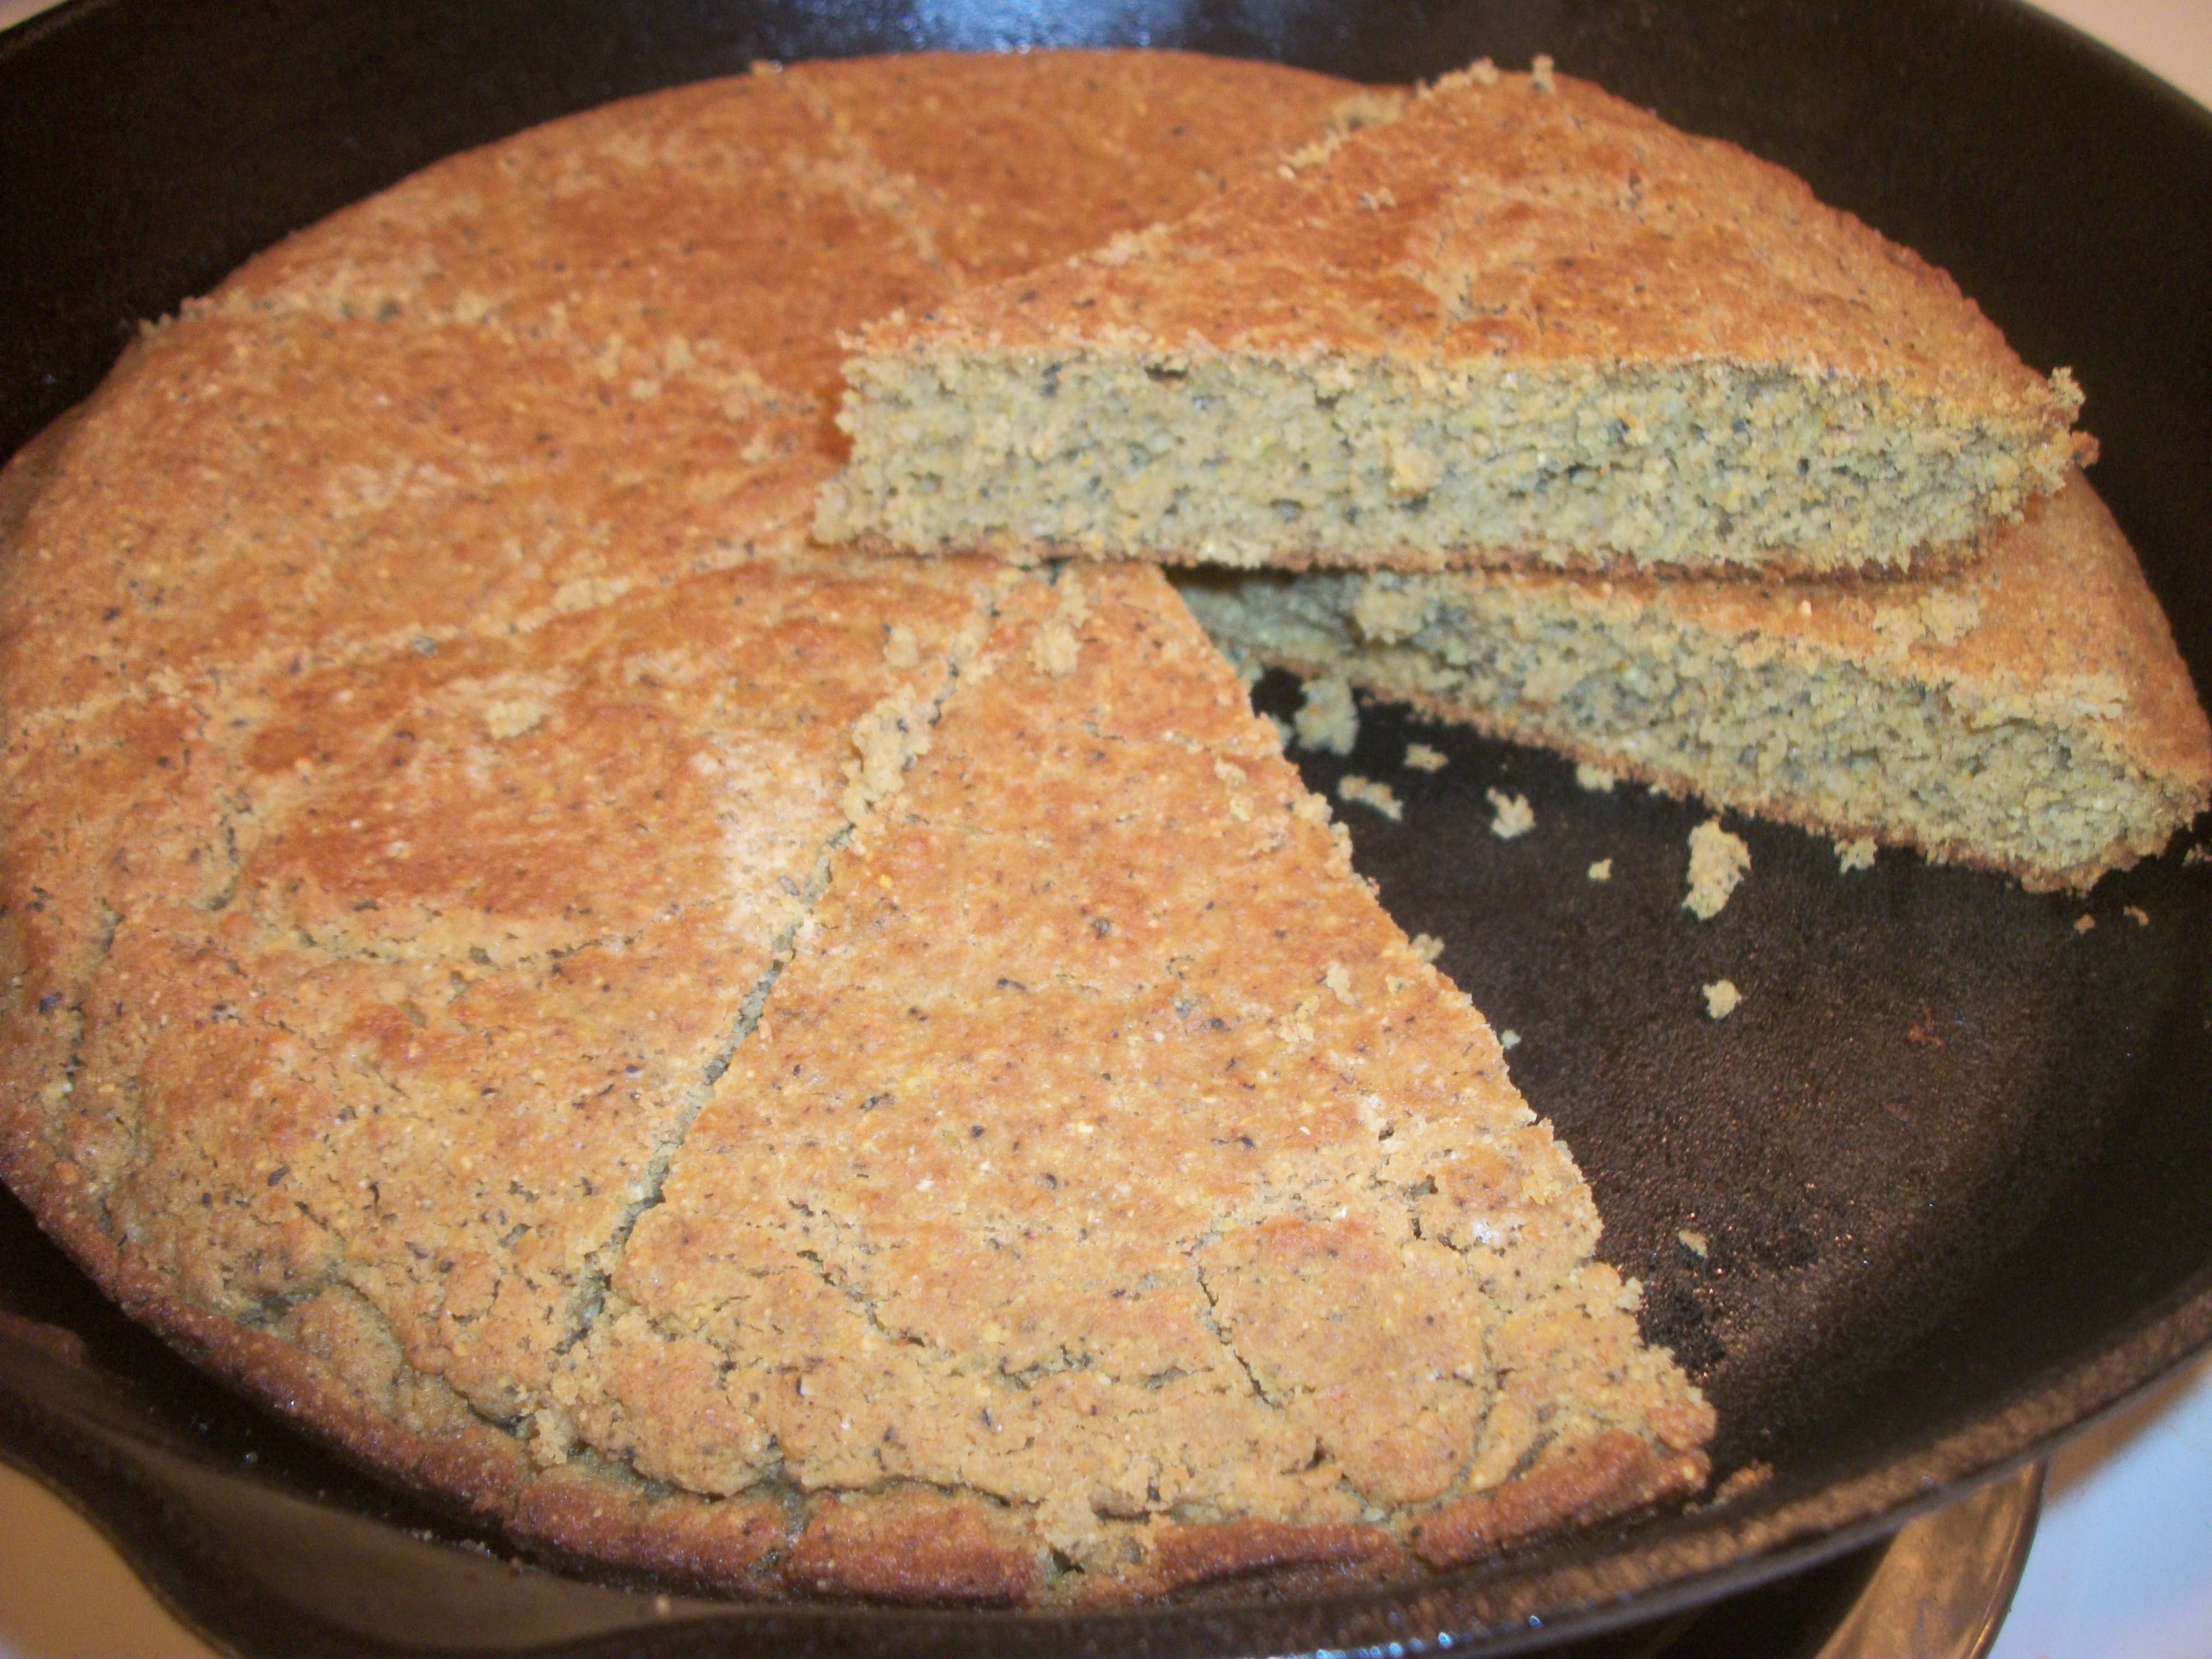
Let cool for 10 minutes. Slice into 8 pieces and serve with butter and honey, yummy!
Notes
I suggest using less sugar for normal cornbread, unless you intend on it being dessert style. If this is the case add more and also include ½ - 1 tablespoon REAL vanilla extract. For a yummy texture, take one tablespoon of your sugar and set to the side. When you poor your batter in the pan, sprinkle it on top.
A probably not very traditional pork and shrimp shumai recipe that is easy to make and very customize-able. Feel free to replace all or most of the shrimp with pork or another meat. Try chicken or lamb, skys the limit! They are lighter in flavor so feel free to double the seasoning if you prefer stronger flavor.
Author: FaylinaMeir
Recipe type: Appetizer
Cuisine: Asian
Serves: 42
Ingredients
Shumai
½ to ¾ lb ground pork
1 lb shrimp, raw shrimp is preferred but if you cannot find choose cooked shrimp that you have thawed for at least 24 hours
¼ cup onion or 6-8 green onion
1 tablespoon soy sauce
1 tablespoon sesame oil
2 tablespoons ginger, about a 2 inch piece
1 tablespoon crushed garlic
pepper to taste
1 tablespoon potato or corn starch
30-60 circle style dumpling wrappers or cut square wrappers with a 4 inch circle cutter
Dipping Sauce
2 tablespoons rice wine vinegar
2 tablespoons soy sauce
some chopped onion
some chopped chili peppers or pinch of ground chili, optional for heat
½ teaspoon sesame oil
pinch sugar
Instructions
Shumai
Pulse shrimp, garlic, ginger, and onion in a food processor until small pieces. Try not to blend it into a paste, you want some texture. If you prefer you can turn half of it into a paste, but no more than that.
Mix in a bowl with the pork, soy sauce, sesame oil, and starch powder very well. Use your hand and get in there and squeeze it together. Let this mixture sit at least 15 minutes. Several hours is better up to 8 hours in the fridge.
After at least 15 minutes, get a pot of water boiling with your steam basket. At least an inch, maybe two. I suggest you wrap your lid like shown in the video to prevent water from dropping into your shumai.
For filling, wet the wrapper with water quickly and take 1 tablespoon of meat mixture and place into the middle of the wrapper. Make a circle with your hand and use that to push the filling into the wrapper. Pinch the top a bit and pleat the insides if necessary. Squeeze in the middle a little and push against the counter to flatten the bottom. Repeat this for the entire bowl. You should get 30-60 depending on how much you add into the wrappers. I got 42.
Once you're done making all the shumai, add them to your steamer, you want to fill the steamer but don't let them touch. Steam them for 10-20 minutes depending on the size you made. I checked mine after 15 minutes and they were done. You'll want to cook it until the internal temp reaches 145. (If you don't own a thermometer and you should!) cook until the inside is no longer pink.
Let cool for a few minutes before eating. Serve with soy sauce or a vinegar soy dipping sauce.
Dipping Sauce
Mix together and serve. The onions taste amazing if you let this sit in the fridge overnight however.
This recipe is a culmination of MANY years of tweaking many recipes I have found online. I wanted to try to use something other than sugar and no milk products but yet still have a "tangy" taste. This recipe fits the bill and best of all it only 170 calories per slice!
Author: FaylinaMeir
Serves: 8 slices
Ingredients
1 cup cornmeal
1 cup whole wheat flour
1 cup water
1 tablespoon apple cider vinegar
5-8 tablespoons maple syrup (see note)
1 tablespoon double acting baking powder
½ teaspoon baking soda
1 egg
2 tablespoons oil
½ cup applesauce
1 teaspoon sugar for sprinkling, optional (see note)
1 tablespoon vanilla, optional (see note)
Instructions
Preheat your oven to 400°F or 200°c. Once preheated add in a large cast iron skillet or a metal baking tray and preheat for another 5-10 minutes.
In a large mixing bowl add in all your dry ingredients, mix well, and set aside. In another bowl mix all your wet ingredients except 1 tablespoon of the oil. Set these aside until your skillet or pan is heated.
After the 5-10 minutes of preheating your skillet, carefully remove it from your oven and add in your 1 tablespoon of oil. Use a brush if available to spread the oil around the bottom and sides to prevent sticking, this also creates a very yummy crust.
RIGHT before adding it to the pan completely mix the wet into the dry ingredients removing any lumps. Add the mixture from a height to remove large air bubbles and make sure it coats the bottom of the pan. Return to oven and bake 30-35 minutes or until a toothpick comes out clean.
Let cool in pan 20 minutes and enjoy!
Notes
In this recipe I used maple syrup. You can replace it with honey or another liquid sweetener if you choose. If you would like to use sugar you'll need to add ½ cup to ¾ cup depending on sweetness and another ¼ to ½ cup of water to adjust the consistency. For a mild tasting cornbread only add 5 tablespoons of maple syrup (even then it's slightly sweet), this is great for mixing with spicy chili. If serving as more sweet add 8 tablespoons maple syrup.
I used about 1 teaspoon of sugar to sprinkle on the top because it makes the top crunchy, this is totally optional and usually I don't do it!
I don't normally add vanilla but if you want a more dessert tasting cornbread add 1 tablespoon of real vanilla extract.