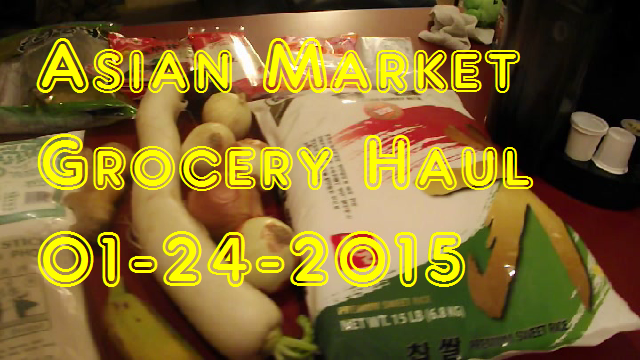
This grocery haul was all about stocking up on the essentials that aren’t that common. Of course we need our staple: rice, but also things like sesame oil, and kimchi making supplies. My main reason for going was to purchase pig fat to render into lard, that video will be coming soon I promise!. Life has been fast paced lately so I apologize for not uploading recipes this week.
A probably not very traditional pork and shrimp shumai recipe that is easy to make and very customize-able. Feel free to replace all or most of the shrimp with pork or another meat. Try chicken or lamb, skys the limit! They are lighter in flavor so feel free to double the seasoning if you prefer stronger flavor.
Author: FaylinaMeir
Recipe type: Appetizer
Cuisine: Asian
Serves: 42
Ingredients
Shumai
½ to ¾ lb ground pork
1 lb shrimp, raw shrimp is preferred but if you cannot find choose cooked shrimp that you have thawed for at least 24 hours
¼ cup onion or 6-8 green onion
1 tablespoon soy sauce
1 tablespoon sesame oil
2 tablespoons ginger, about a 2 inch piece
1 tablespoon crushed garlic
pepper to taste
1 tablespoon potato or corn starch
30-60 circle style dumpling wrappers or cut square wrappers with a 4 inch circle cutter
Dipping Sauce
2 tablespoons rice wine vinegar
2 tablespoons soy sauce
some chopped onion
some chopped chili peppers or pinch of ground chili, optional for heat
½ teaspoon sesame oil
pinch sugar
Instructions
Shumai
Pulse shrimp, garlic, ginger, and onion in a food processor until small pieces. Try not to blend it into a paste, you want some texture. If you prefer you can turn half of it into a paste, but no more than that.
Mix in a bowl with the pork, soy sauce, sesame oil, and starch powder very well. Use your hand and get in there and squeeze it together. Let this mixture sit at least 15 minutes. Several hours is better up to 8 hours in the fridge.
After at least 15 minutes, get a pot of water boiling with your steam basket. At least an inch, maybe two. I suggest you wrap your lid like shown in the video to prevent water from dropping into your shumai.
For filling, wet the wrapper with water quickly and take 1 tablespoon of meat mixture and place into the middle of the wrapper. Make a circle with your hand and use that to push the filling into the wrapper. Pinch the top a bit and pleat the insides if necessary. Squeeze in the middle a little and push against the counter to flatten the bottom. Repeat this for the entire bowl. You should get 30-60 depending on how much you add into the wrappers. I got 42.
Once you're done making all the shumai, add them to your steamer, you want to fill the steamer but don't let them touch. Steam them for 10-20 minutes depending on the size you made. I checked mine after 15 minutes and they were done. You'll want to cook it until the internal temp reaches 145. (If you don't own a thermometer and you should!) cook until the inside is no longer pink.
Let cool for a few minutes before eating. Serve with soy sauce or a vinegar soy dipping sauce.
Dipping Sauce
Mix together and serve. The onions taste amazing if you let this sit in the fridge overnight however.
Tortillas are one of those things most people never make homemade and that’s a shame, because nothing completes a taco better than a warm freshly made tortilla. This recipe takes the plain wheat tortilla to the next level by adding rye and spelt for extra nutritional benefit as well as great flavor. Combined with sesame oil and extra spices of seasoning, this recipe will win anyone over, vegan or otherwise. Most healthy tortillas (not fully of chemicals or preservatives) are about 40¢ ea which is what I calculated this out to be if divided into 12, so you don’t really save any money, however it’s worth it. Oh and if you’re saying that you can buy a package of tortillas for 2 dollars and you get 10 so that’s 20¢ each, I invite you to read the labels. Chances are the ingredients look like this:
This is the actual ingredients list of a well known brand of “wheat” tortillas. (click here to see the brand and where I’m talking about) I’ll stick to my simple ingredients. With the exception of the Mrs. Dash and the sesame oil, everything in my recipe was organicly purchased so take that into consideration when inspecting the price.
Ingredients:
1/2 – 2 cups warm water
3 cups whole wheat flour, finely ground works best
1 cup spelt flour
1 cup rye flour3 tablespoons oil *see note*
1/4 teaspoon salt **see note**
optional:
3 tablespoons oil *see note*
seasonings (I used chipotle powder and Mrs. Dash)
1 teaspoon yeast (gives great flavor)
Also suggested for this recipe is a cast iron griddle, this gives it lots of extra flavor.
Directions:
In a large sized bowl add your flours, yeast, salt, seasonings, and oil. Stir with a spoon until the oil starts to clump and you mix the flours well. Slowly mix in your hot water, you may need more or less depending on the types of flours you use. I used 2 cups minus 2 tablespoons. The trick is to get a nice dough consistency, without making it too moist. In this case, less water is better. When your dough just starts to come together and it still kind of crumbly, turn the dough out onto a flat surface. You can do the kneading in a bowl, however it makes it more difficult, in my opinion.
With dry hands, knead the dough. Push down the dough with the bottoms of your palms, then raise the dough back up and turn sideways 90 degrees. Repeat this process until your dough is your desired consistency. For chewy and soft pliable dough like what you’d buy in the store, I suggest kneading vigorously for at-least 10 minutes. You will know your dough is ready for rolling when you can press your finger into the dough and it partly holds it shape, but mostly bounces back at you. The dough will also be very smooth and soft looking. For me it took about 16 minutes of average speed kneading. Technically, you don’t have to knead at all, but the consistency won’t be the same and since these are multigrain they might be a bit tough.
Divide your dough into equal sized portions. I decided to make 12 pieces out of this recipe, and they yeilded 8 inch tortillas, you make divide them into smaller or larger pieces to suit your needs. Roll out each ball into the desired size.
Heat your cast iron griddle over medium high heat, until a drop of water will dance on the skillet for 2 seconds before evaporating. Turn down your heat to just below medium, and add your dough. Pay attention not to let the dough fold over the edges, so it cooks evenly. Cooking time is about 30-60 seconds per side, depending on if you use a cast iron skillet or not. Add your rolled dough sheet onto the griddle and do NOT move it until you start to see bubbles appear on-top of the dough. Flip and wait another 30 seconds, then check your dough. If the other side is browned slightly, then it is done. Repeat this until all your tortillas are cooked and Enjoy!
Heres a great tip: Take a skillet with a lid and place a towel or cloth into the bottom. Place your tortillas in this pot once cooked and replace the lid. The towel prevents the steam collecting and turning your tortillas soggy, while keeping the tortillas nice and soft.
To reheat these you can slightly warm in an unoiled skillet or place however many you need on a place, cover with a dampened paper towel and place into the microwave for 30-60 seconds or til heated through. (I do not endorse the use of microwaves, however I know some people use them)
*note: I like using 2 tablespoons sesame oil and 1 tablespoon neutral oil like grape-seed to give extra flavor to the tortillas, however you may use any kind you want, or you may omit it all together. However, oil helps keep the tortillas pliable.
**note: If you are using a seasoning mix that contains salt, do NOT add the additional salt.
Nutritional Information is based off 12 servings (as shown in video) and assumes you used the same ingredients I used. Yours may vary.
So this video is FAR too long to recap everything said, however if you know your basic way around a kitchen you will not need the step by step instructions. If you do I would suggest watching the video. If you have any questions you can always ask me in a comment or on facebook.
Ingredients: (3 servings)
6 cups cooked quinoa
3 medium-large baked potatoes
15 ounces snap peas or stringless peas
1 pound brocooli
1 1/2 tablespoons minced garlic
1/2 inch piece of minced ginger (about 1 tablespoon)
1/2 tablespoon grapeseed oil
1/2 teaspoon sesame oil
1 1/2 tablespoons sesame seeds
2 bunches or about 5 ounces green spring (welsh) onions
ultra low sodium soy sauce about 1-2 tablespoons
about 3 tablespoons water
chili sauce or ketchup (or anything else) as seasoning
you will also need a heat resistent spatula and a wok
knife
cutting board
Directions:
Prep your brocolli by cutting the tips of the flourets off. Thinly slice the remaining stocks, they’re good food too! If your peas have strings you will need to string them. I buy the stringless versions but I still take the papery white bits off the ends. You will want to thinly slice your green onions. Slice your prebaked potatoes in smaller sized (bite-sized) pieces. Mince your garlic and ginger finely. If using preminced, make sure to wash well under warm/hot water to remove chemicals.
In a wok add your half tablespoon grapeseed oil, spread it around the pan. Turn the heat on high and add a small piece of brocolli into the pan. When it starts to sizzle you know its hot. Also now is a great time to add 1 1/2 tablespoons of sesame seeds, if using. When the seeds start to pop or the brocolli starts to sizzle, add the rest of your brocolli. Stir well to coat with oil. Then add your peas in. Stir fry this for 3 minutes. Then add your water, one tablespoon at a time while stiring. This helps to steam and cook through the vegetables, giving them better texture. At this point you’ll notice just how green they get, very pretty right?
After all the water is in , add your garlic and ginger as-well-as your green onions. Stir well and continue to stir fry for 5 or so minutes. At this point taste your brocolli for texture. If it is soft enough, add your soy sauce and sesame oil. Stir fry 1-2 more minutes and turn off the heat. Stir in gently your potato slices.
To serve this, place your quinoa on a plate and top with the vegetable potato mixture. Put on chili sauce or ketchup or any other desired sauce and enjoy! This ended up making 3 servings. Here is the nutritional information:
So I was watching my Youtube subscriptions today and there was a new video from ShayLoss. For those who have never seen his videos, its a channel of this guy named Shay who used to be really obese and now hes lost a bunch of weight. He gives tips for healthy living and weight loss, etc. He is not a vegan, but he gives good advice. His video today was a recipe, click HERE for the video, but warned though its 23 minutes long. The gist of this video was a recipe for a quinoa salsa/taco filling sorta thing. It was good sounding, but you know me, I had to change it a bit. It tasted SO good I knew I had to share. So please try this. Everything you need for it is in season right now!
Ingredients:
2 cups white quinoa, rinsed VERY well
3 cups water
3 large tomatoes , diced
1 medium bell pepper, diced
1 medium white onion, diced finely
1 bunch cilantro, minced
1 hot pepper (optional), minced and seeded
3 tablespoons garlic, minced finely
1-2 limes, juiced
1 can chickpeas, rinsed VERY well
2 tablespoons grapeseed oil
2 tablespoons sesame oil
2 tablespoons low sodium soy sauce (no more than 20% sodium per tablespoon, less is better)
1 tablespoon cumin powder
Directions:
Start out by rinsing your quinoa very well. The easiest way to do this is use a large bowl and place the quinoa in it. Fill with very warm/hot water and use your hands to kinda squeeze the quinoa. Don’t worry, you won’t hurt it! Drain the water by slightly tipping the bowl, I do this over a fine mesh strainer in-case I spill some. Repeat this until the water is clean and the qunioa does not feel slimy or has lots of bubbles.
Bring your 3 cups of water to a boil in a larger sized pot with a lid. Add in your quinoa when the water is vigorously boiling. Stir well to ensure there are no clumps. Reduce the heat to a simmer (that’s a 2 or 3 on electric stoves). Cover with the lid and let cook for 5 minutes. Stir and recover. Let cook for 10 more minutes. Stir again making sure to scrap the bottom. If all your water has been absorbed, recover and turn off the heat and let set 10 minutes. If it still needs time to cook off the water, give it 5 more minutes. (after a total of 20 minutes, if you still have water left, you’ll need to strain it because you probably added too much, don’t worry its still fine!)
While your quinoa is resting for 10 minutes, prepare all your other ingredients. Keep in mind you want your veggies in smaller sized pieces. Core your tomatoes and dice them. Seed a bell pepper and finely dice. Mince a medium onion or thinly slice. Mince your garlic and wash in warm water to remove bitterness. Finely mince your cilantro, I choose not to use the stems since they are tough, but you can if you want. If you want a little extra flavor, add a FINELY minced chili pepper. I suggest removing the seeds, but if you want super spicy you can leave them in. I used a Fresno pepper, they’re red in color and have a nice spice and flavor. Open a can of chickpeas and rinse them very well, there should be no bubbles left and no slimy texture.
After your quinoa has rested, add all your prepared vegetables. Stir well and break up any clumps of quinoa. Now juice your limes into the mixture. I used a HUGE lime (it was the size of a lemon, no joking!) so I only needed one, however you might need two. Taste as you go and adjust the flavor. Stir well again.
In a small bowl, add your oils, soy sauce, and cumin powder. Whisk this together well and then add it into the quinoa. Stir VERY well. This is your sauce so you want to ensure you get it on all the pieces.
Try it now, if it needs more salt, add more soy sauce or use coarse salt. If it needs more tangyness, add more lime juice. Serve warm with tortillas or chip. OR Serve cold and mix with lettuce or cooked pasta for a new flavor.
I honestly have no clue how much this makes since I didn’t measure it, however I ended up with a large dutch oven full of it! I’m guessing around 10 cups. This is an amazing recipe and I think one that everyone should try, even if you’re not sure about the quinoa. If you cannot find quinoa for some reason I would suggest trying this with couscous if you can eat gluten or buckwheat groats if you cannot. The nutritional information is for quinoa and all the ingredients listed above. Serving size I gave was 100g, however in the picture above that is a small 5 inch plate with 312g on it. While it still does have fat added to it, its far less than the original recipe and honestly it adds to the flavor. I ate this with a little bit of chipotle salsa on-top. Enjoy! (and yes, as you can see this is a kitty approved recipe!)