Making kimchi is a really easy thing to do. I know it seems daunting, but I promise, you'll love the end result! Best of all this recipe is vegan, but easily made more traditional. If you use gluten free tamari, it's also suitable for those with gluten allergies.
Author: FaylinaMeir
Serves: 10 servings
Ingredients
2.2lbs (1 kilo) napa cabbage
¼ cup coarse sea salt (for salting)
300g daikon radish (or Korean radish)
1 medium or 2 small carrots
8 green onions
porridge
2 cups water
2 tablespoons sweet rice flour
¼ cup soy sauce or fish sauce
½ cup to 1½ cups red pepper powder
1 tablespoon sugar, optional
2 generous tablespoons ginger, peeled (about a 1½ by 1 inch piece)
8 cloves garlic
½ sweet apple or ½ korean pear or 1 small pear
supplies
1 jar glass jar with tight fitting lid
sauce pan & whisk
blender or stick blender
gloves, HIGHLY suggested for mixing
Instructions
You need to start out by salting the cabbage. This step is easy I promise. Follow along with the video. Cut the cabbage head into 4 pieces like shown and rinse under cold water. Shake the excess water off, and sprinkle salt into each leaf. Don't skip this step, if you don't salt it well enough the end result isn't very good! Leave the cabbage in a glass bowl to set.
After 1 hour, toss the cabbage over, put any larger and thicker pieces towards the bottom. If you want you can spoon over the juice to help soak better.
After another hour (2 hours total) check the cabbage, it shouldn't be gooey but softened. If you taste a piece it will have a slight crunch, but slightly salty.
Rinse the cabbage 2-3 times under cold water. Make sure to rinse off each leaf. You don't want excess salt in your kimchi.
Set the cabbage in a strainer to dry out some while you prepare the porridge.
Add 2 cups of cool water to a saucepan, and whisk together 2 tablespoons of sweet rice flour (often called mochiko because of the brand name). Make sure you remove ALL lumps before you turn the heat on. Turn to medium high and do NOT stop whisking. Once you notice the mixture starting to thicken, reduce heat to medium and cook it for about 2 minutes. It's very important to keep mixing to prevent lumps.
After 2 minutes, shut off the heat and stir in your sugar, soy sauce (or fish sauce), and red pepper powder. Then transfer to a blender jar. If you had an immersion blender (stick blender) this would work better.
Add your mixture to blender along with your ½ apple or pear, garlic, and ginger that you have peeled. Blend on high until all the ginger and garlic are mixed in.
Let this mixture cool to around body temperature. Don't skip this step or you'll cook the cabbage.
Once the mixture is cooled, mix together with the carrot, green onion, and daikon (or Korean) radish. As shown in the video, spread a little mixture onto each leaf and outside of the cabbage. Put into, preferably, a glass jar with a tight fitting lid. An old pickle jar would work great for this. Pack it down and you're done.
Let this sit at room temperature overnight, up to 2 days depending on the season. You want it to smell a little sour and you'll see bubbles from the bacteria in the cabbage. Transfer to your fridge and it'll be good for weeks, couple months even.
Obviously you can eat it right after making it, but after 2 days is better. The juice can be used for soups or pancakes and the longer the kimchi sits in the fridge the more sour it tastes. We love it!
Notes
If you want more traditional kimchi, replace the soy sauce with fish sauce. Also if you are making this for someone who is allergic to gluten PLEASE make sure the tamari you use is certified gluten free!! I cannot stress this enough!
Do NOT use table salt for salting the cabbage, you will end up with gooey cabbage.
The apple/pear is optional but adds a yummy mellow flavor to the kimchi. The sugar is also optional, but if you're a baby with spice like I am, it really makes a difference.
You can add as much or as little red pepper powder as you want. I don't like it very spicy so I added ½ cup, but you can add 1½ cups if you like it very spicy!
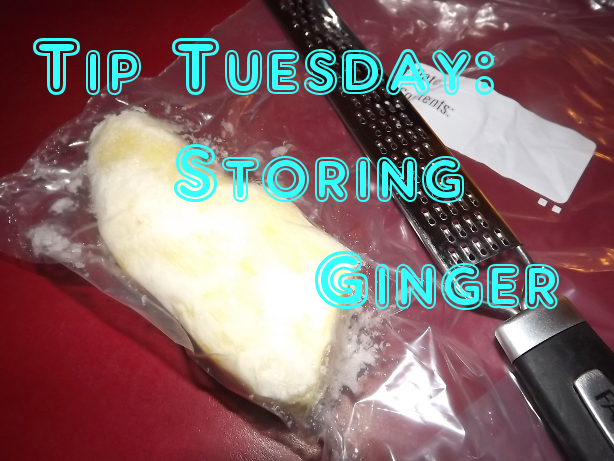
Okay guys you’re going to think I’m nutty, but this is so simple It only took me a minute to explain it in video! Do you often find yourself buying fresh ginger for an extra kick to a stir fry or maybe you tried that old fashion recipe for ginger snaps and then just had extra? Here is a great tip to save you money on ginger! Peel a large piece of ginger and put it in a zip lock bag. Then when you’re ready to make stir fry or cookies, use a fine grater to shave some off. The texture is often nicer AND you won’t waste money on molded or dried out ginger again. It works great I promise!
If you have any tips for a tip Tuesday please leave me a comment or send me an email. Thanks!
This is my go to dressing. This recipe can be vegan friendly if maple syrup or another liquid sweetener like agave is used. It can also be a raw dressing depending on your ingredients. If making this for someone with gluten issues, please insure you use gluten free tamari/soy sauce, AND gluten free vinegar.
Ingredients:
1 cup grape-seed oil or extra virgin olive oil
1/4 cup sesame seed oil*
2 1/2 tablespoons whole sesame seeds
1/4 cup balsamic vinegar
1/4 cup soy sauce
1/2 – 1 teaspoon black pepper, freshly ground is best
2-4 tablespoons honey or liquid sweetener of choice**(see notes)
Ginger***(see notes)
Directions:
In a large bowl (high sided works best), add in your vinegar, soy sauce, and honey or other sweetener. Slowly whisk in 1/2 cup of oil. This should take 1-2 minutes of vigorous whisking. The trick is to make a dressing and not oily vinegar, there is a difference. Once you have 1/2 cup of oil in, try your sauce and if desired add the rest of the oil. At this point if you’re using it, whisk in the sesame oil as well. Once all your oil is whisked in, add your extra flavors or extra sweetener if desired. I used whole sesame seeds and black peppers. Stir in and you are done!
To store this dressing use a mason jar or repurposed glass jar with a tight fitting lid OR use a VERY well cleaned salad dressing bottle, I like the ones with the caps on the lid that restricts the amount that comes out at one time. In the fridge this will last for weeks, maybe a month or so I have never tried it that long. Before using, shake really well to re-emulsify and you’re ready to go.
*If you do not want to use or don’t have access to sesame oil, you can substitute it with regular oil or leave out entirely.
**If you are vegan or simply do not use honey, feel free to use maple syrup or agave. If neither appeal to you, try making a simple syrup by boiling 1/4 cup water with 2 tablespoons sugar. Whisk well to ensure no grainy texture. Once cooled, substitute this in for honey. Start with 1 tablespoon and try it from there as this changes the flavor.
***If you want to add a ginger flare to this dish, use a microplane or fine tooth grater and grate some ginger into the bowl. I would suggest 1/2 – 1 tablespoon. Whisk this in with the sesame seeds. Optionally you can add other flavors such as fresh garlic or chili flakes to change the flavor.
PLEASE TAKE NOTE: If you are making this and/or cooking for someone with gluten allergies or celiacs disease. Make sure to purchase ingredients that are certified gluten free, and clean your utensils very well. Better safe than sorry.
Nutritional information is per tablespoon, Thanks!
So this video is FAR too long to recap everything said, however if you know your basic way around a kitchen you will not need the step by step instructions. If you do I would suggest watching the video. If you have any questions you can always ask me in a comment or on facebook.
Ingredients: (3 servings)
6 cups cooked quinoa
3 medium-large baked potatoes
15 ounces snap peas or stringless peas
1 pound brocooli
1 1/2 tablespoons minced garlic
1/2 inch piece of minced ginger (about 1 tablespoon)
1/2 tablespoon grapeseed oil
1/2 teaspoon sesame oil
1 1/2 tablespoons sesame seeds
2 bunches or about 5 ounces green spring (welsh) onions
ultra low sodium soy sauce about 1-2 tablespoons
about 3 tablespoons water
chili sauce or ketchup (or anything else) as seasoning
you will also need a heat resistent spatula and a wok
knife
cutting board
Directions:
Prep your brocolli by cutting the tips of the flourets off. Thinly slice the remaining stocks, they’re good food too! If your peas have strings you will need to string them. I buy the stringless versions but I still take the papery white bits off the ends. You will want to thinly slice your green onions. Slice your prebaked potatoes in smaller sized (bite-sized) pieces. Mince your garlic and ginger finely. If using preminced, make sure to wash well under warm/hot water to remove chemicals.
In a wok add your half tablespoon grapeseed oil, spread it around the pan. Turn the heat on high and add a small piece of brocolli into the pan. When it starts to sizzle you know its hot. Also now is a great time to add 1 1/2 tablespoons of sesame seeds, if using. When the seeds start to pop or the brocolli starts to sizzle, add the rest of your brocolli. Stir well to coat with oil. Then add your peas in. Stir fry this for 3 minutes. Then add your water, one tablespoon at a time while stiring. This helps to steam and cook through the vegetables, giving them better texture. At this point you’ll notice just how green they get, very pretty right?
After all the water is in , add your garlic and ginger as-well-as your green onions. Stir well and continue to stir fry for 5 or so minutes. At this point taste your brocolli for texture. If it is soft enough, add your soy sauce and sesame oil. Stir fry 1-2 more minutes and turn off the heat. Stir in gently your potato slices.
To serve this, place your quinoa on a plate and top with the vegetable potato mixture. Put on chili sauce or ketchup or any other desired sauce and enjoy! This ended up making 3 servings. Here is the nutritional information: