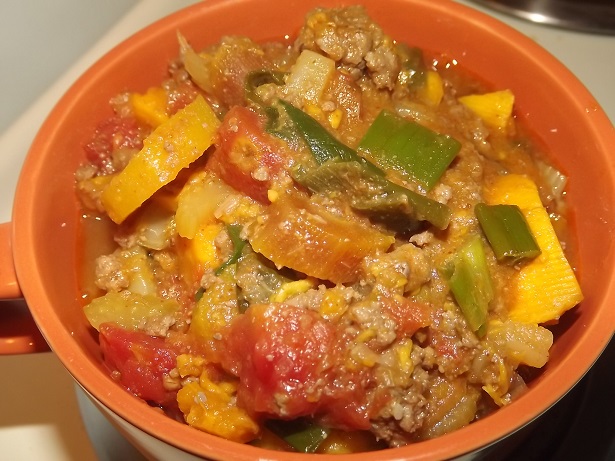
Paleo Sweet Potato Chili
Paleo Sweet Potato Chili
Prep time
Cook time
Total time
This paleo/primal approved chili is naturally sweet and delicious. It has a good amount of carbs and is super filling! It even tastes great the next day.
Author: FaylinaMeir
Serves: 6 servings
Ingredients
- 1 pound ground beef
- 2 tablespoon lard
- 1 large onion diced or 10 ounces green onions (reserve some tops)
- 2 pounds sweet potatoes cut into 1 inch cubes
- 1 lb carrots cut into ½ inch slices
- 1 lb finally slices celery
- 2 14.5 ounce cans of diced tomatoes in juice (you can use tomato puree also)
- 2 cans of water (use the tomato cans)
- 2 cups chicken stock or beef stock
- 1 bay leaf
- 1 teaspoon fennel powder
- 1½ tablespoon chili powder (you can use up to 4 tablespoons if you wanted it hotter)
- 1 tablespoon ground cumin
- 1 tablespoon garlic powder
- 1 tablespoon fish sauce (optional but suggested!)
- salt if needed
Instructions
- In a large pot heat your lard (or other cooking fat) over medium high heat. When it's fully heated add in your onions. If you're using green onion (spring onion) reserve the green tops for later. Cook for about 2 minutes, then add in your ground beef. Break it up a little and add a lid to the pan for easier cooking. If you need to you can add a few splashes of water. Let this cook for 3 or so minutes.
- After 3 minutes break up your meat into smaller pieces, a nice trick is to use a potato masher for this. When you're happy with the thickness, add in your potatoes, carrots, celery, canned tomatoes + the water, chicken or beef stock, and your 1 bay leaf. Stir well.
- Put your lid on and bring to a boil. Once boiling, reduce heat to medium and boil for 40-60 minutes or until a fork goes into the carrots and potatoes with very little resistance.
- After the chili is done, add in the rest of your spices, fish sauce, and salt is needed. I suggest taking a little of your liquid and mixing these in a bowl and adding into the chili mix to prevent lumps in the garlic powder, but it's not that big of a deal. Adjust the chili powder to your taste.
- You're done! I got 6 servings out of this, about 16 ounces per bowl. The fish sauce isn't required but it's a natural source of umami and really kicks the chili up a notch.

Notes
Fattier beef is preferred in this recipe. All I had was 96% lean so the fat calories are way down for nutrition, if you use 80% it would be better!
You CAN use a slower cooker (I haven't done it yet though), my guess is 6-8 hours on low or 4-6 hours on high.
Please note that you want the bare minimum of liquid here, this is going to be a very hearty chili!
You CAN use a slower cooker (I haven't done it yet though), my guess is 6-8 hours on low or 4-6 hours on high.
Please note that you want the bare minimum of liquid here, this is going to be a very hearty chili!
Nutrition Information
Serving size: 16 ounces Calories: 333 Fat: 8 Saturated fat: 3 Unsaturated fat: 3 Trans fat: 0 Carbohydrates: 47 Sugar: 15 Sodium: 890 Fiber: 9 Protein: 20 Cholesterol: 44

