Chocolate / Desserts / Gluten Free / Recipes / Vegetarian
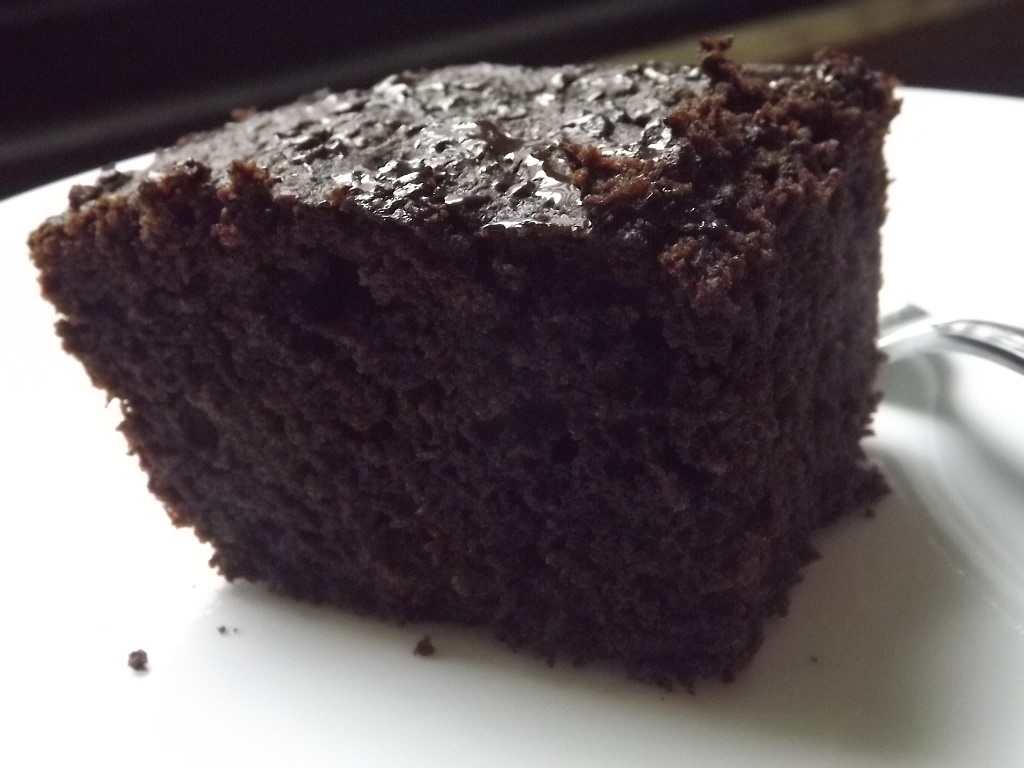
Gluten Free Paleo Brownies
- ½ cup Coconut Flour
- ¼ cup Tapioca Starch
- ¼ cup Toasted Carob Powder (or ¼ cup cocoa powder)
- ½ tsp, Baking soda
- 1 tsp Baking Powder Aluminum Free & Double Acting
- 3 eggs
- ¼ cup plus 2 tablespoons Coconut Milk
- ¼ cup Honey
- 1 tsp Pure Vanilla Extract
- 2 tsp apple cider vinegar
- 2 tablespoons Coconut Oil
- Preheat your oven to 350f (175c).
- In a large bowl mix together your eggs and honey until well combined. Then add your apple cider vinegar, vanilla, coconut milk, and coconut oil. Don't worry if your coconut oil forms little solid pieces, this is actually what you want because when the brownie bakes it makes these yummy little pockets. Make sure you whisk this together very well, you don't want the oil chunks very large.
- In another bowl, mix the rest of your ingredients together well. You don't want any lumps.
- Grease your baking container well; I used a glass loaf pan. Don't use a large pan if you want these to be taller. Once your oven is well preheated, mix your dry ingredients into your wet ingredients and whisk til there are no lumps. Scrape your batter into your container and even it out.
- Bake in the middle of your oven for 25-35 minutes (see notes). I like my brownies well done so I went the full 35 minutes. A toothpick inserted into the middle will come out clean. Let cool in the pan for at east 10 minutes. Serve warm, and try some butter on top, it tastes amazing!
If you want more fudgy/gooey brownies only bake it about 80% done, about 25 minutes. A toothpick will come out almost clean and might be a little jiggly in the middle. Let cool at least 20 minutes.
Serving size: 1 Calories: 225 Fat: 11 Saturated fat: 8 Unsaturated fat: 1 Trans fat: 0 Carbohydrates: 27 Sugar: 15 Sodium: 217 Fiber: 5 Protein: 6 Cholesterol: 106
3.3.3070
Breads / Recipes / Side Dish / Vegetarian
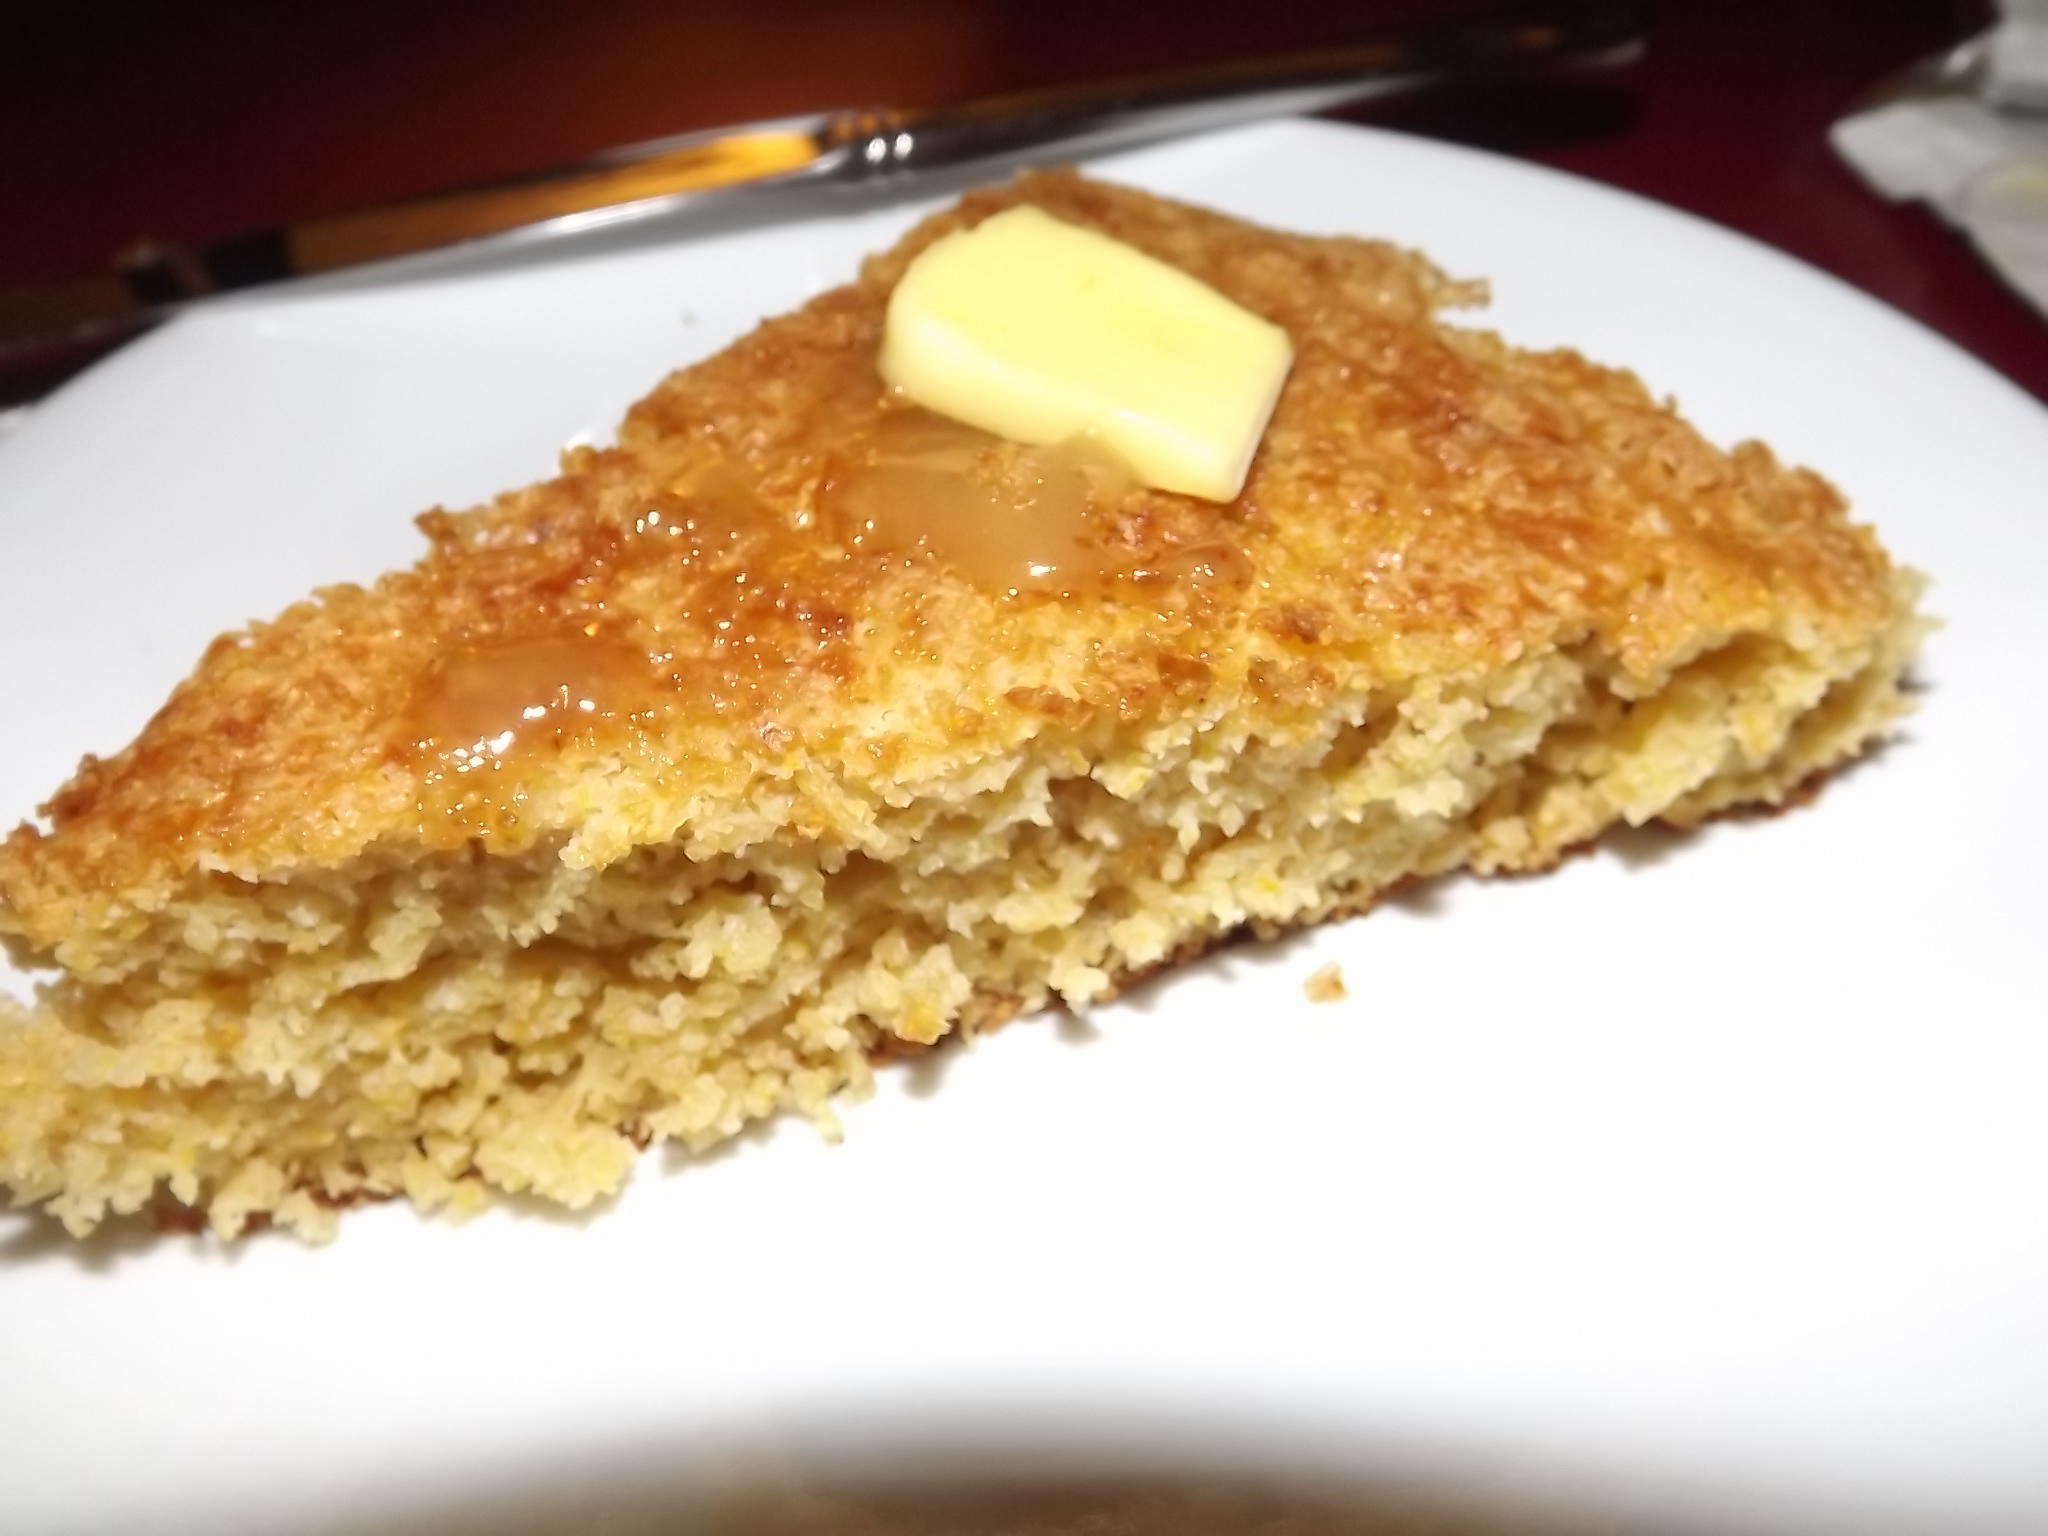
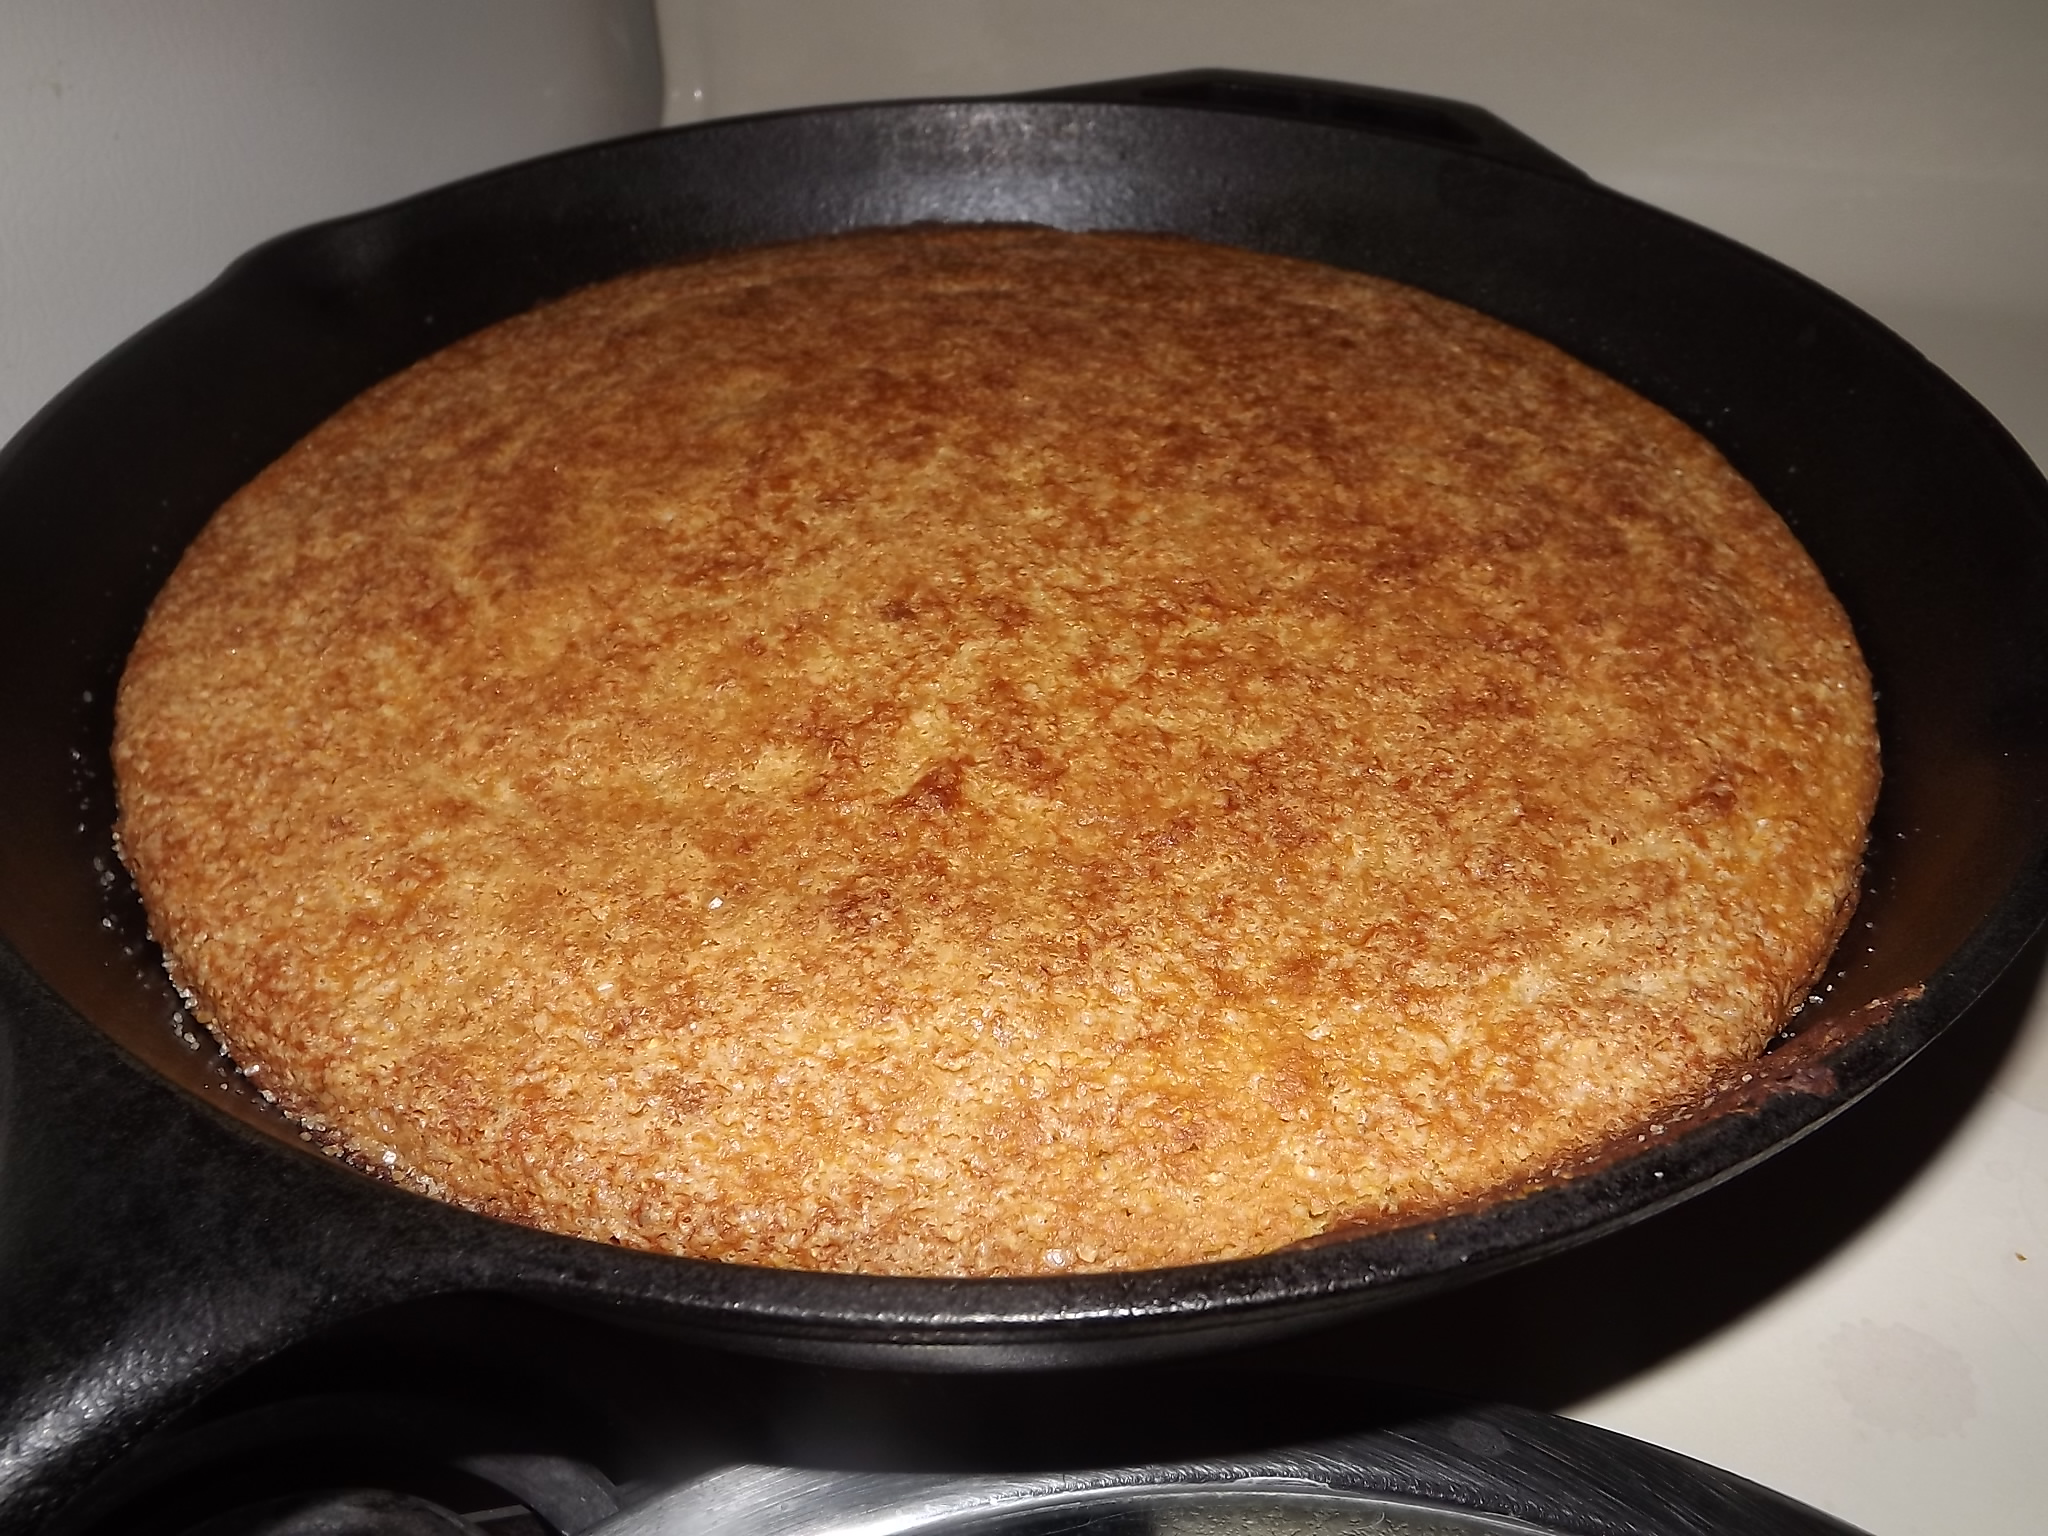
Simple Cornbread Recipe
- 1 cup cornmeal
- 1 cup whole wheat flour
- 1 cup milk
- 1 tablespoon vinegar
- 1 large egg
- ½ cup water
- ½ cup unsweetened applesauce
- 1 tablespoon oil for batter, can also use melted butter
- 1 tablespoon oil for greasing pan
- ¼ to 1 cup of sugar (see notes)
- 1 tablespoon baking powder
- ½ teaspoon baking soda
- Preheat your oven to 400 degrees Fahrenheit, this is approx 200 Celsius. If you are using a cast iron skillet, and you SHOULD, put that in to preheat as well.
- Add your milk and vinegar into a bowl on the side and let this set for a few minutes, this makes faux buttermilk. If you want you can just use buttermilk instead without the vinegar.
- Mix together all the dry ingredients in a bowl, if you want to sprinkle some sugar on top reserve about 1 tablespoon.
- Add your remaining liquid ingredients to the milk mixture. DO NOT mix the liquid into the dry until the pan and oven are preheated.
- Once your pan is well preheated, remove from the oven and add your 1 tablespoon oil. Spread around CAREFULLY with a heat resistant spatula.
- Now you may mix the dry and the wet together, try to remove all lumps. Once your mixture is smooth pour it into your pan. Scrape the bowl out and smooth the mixture in the pan if needed.
- Bake for 25-40 minutes or until a toothpick inserted in the center comes out clean. For me this takes 25 minutes but in my old apartment is took 40, so use a toothpick please!
- Let cool for 10 minutes. Slice into 8 pieces and serve with butter and honey, yummy!
I suggest using less sugar for normal cornbread, unless you intend on it being dessert style. If this is the case add more and also include ½ - 1 tablespoon REAL vanilla extract.
For a yummy texture, take one tablespoon of your sugar and set to the side. When you poor your batter in the pan, sprinkle it on top.
Serving size: 1 piece Calories: 212 Fat: 6 Saturated fat: 1 Unsaturated fat: 4 Trans fat: 0 Carbohydrates: 38 Sugar: 15 Sodium: 273 Fiber: 3 Protein: 5 Cholesterol: 29
3.2.2925

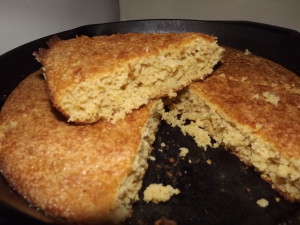
Look how yummy it looks!
Want to know more about why we use both baking soda AND baking powder, check out this article from epicurious.com – CLICK HERE
Desserts / Recipes / Vegetarian
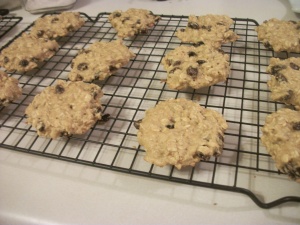
Healthy Oatmeal Raisin Cookies - Dairy Free
- 1½ cups rolled oats, uncooked
- ¾ cup all purpose flour*
- ¼ cup plus 2 tablespoons whole wheat flour*
- 1 teaspoon baking powder (double acting is best)
- 1 egg
- ¼ cup maple syrup
- ¼ cup cane sugar**
- 1 teaspoon molasses (optional but makes it more chewy)
- 1 tablespoon vanilla extract, only the real stuff please
- 2 tablespoons neutral oil, I used coconut
- ½ cup unsweetened applesauce
- 1 unpacked cup raisins***
- Preheat to 350°F or 175°C.
- This step is optional but if you want softer raisins I would advise it. Mix all your liquid ingredients (minus the egg) and let it soak for 20-60 minutes. You can go overnight but they get really soft and I dislike that. I did mine for only 10 minutes and that was good for me.
- Next mix all your dry ingredients in your bowl and then add your raisin mixture and egg. Use a spatula to mix (or a spoon) thoroughly. It is a thicker batter so don't be alarmed.
- Line your cookie tray with parchment paper or a silicone baking mat. Spoon out a rounded tablespoon per cookie and squish them down. These cookies will rise slightly but will not spread outward. I suggest no more than 12 per tray.

- Bake these cookies for 12 minutes and move to a wire rack to cool. They get chewier as they cool.
Variations:
* : You can use all whole wheat flour or all all purpose flour it's a person preference. Whole wheat flour will make the cookies more dense. I would do no more than ½ and ½ but that is me.
** : You can use all sugar or you can skip the sugar and just use maple syrup (or honey). Brown sugar would be best but I used evaporated cane sugar and molasses.
*** : You can substitute raisins for any dried fruit to mix this up. Try blueberries and craisins, Delicious!
Serving size: 3 cookie Calories: 90 Fat: 2 Saturated fat: 1 Unsaturated fat: 1 Trans fat: 0 Carbohydrates: 16 Sugar: 8 Sodium: 23 Fiber: 1 Protein: 2
3.2.2925
Uncategorized

Even though they look brown (which they are, but only because I won’t use food dye) these are indeed red velvet cupcakes with cream cheese frosting- (CLICK HERE for recipe). These are amazing to take to office parties or any event where people might have varied diets. These cupcakes are safe for those with gluten allergies or celiacs disease, vegetarians and vegans, (if  using carob) safe for those allergic to chocolate, low fat, and low calorie (compared to most cupcakes)! Whoa! Not many recipes I know of are so socially friendly, so make a batch and take them to your next office party, but you better save a few at home, you might not get any!
Ingredients:
DRY:
2 1/2 cup all purpose Gluten Free Flour – Click Here for my recipe or use any store brought brand
1 – 2 cups sugar (use more if you want it sweeter, I use 1 cup)
4 1/2 teaspoons egg replacement powder – Click HERE for my recipe or any store bought brand works
3 tablespoons roasted carob powder or cocoa powder (I used carob)
1 teaspoon baking powder
1 teaspoon baking soda
1 1/2 teaspoons guar gum
WET:
1/4 cup water
1/2 cup oil
1 cup banana puree (about 2 large bananas) (if you don’t like banana flavor, use applesauce or 1 extra cup oil if you don’t mind the fat calories)
1 cup nondairy milk + 1 tablespoon vinegar – Mix and let set 5 minutes
1 tablespoon vanilla extract
2 teaspoon vinegar
2 tablespoons red food coloring / beet juice or water (If you don’t want artificial colors, just add 2 tablespoons water instead, that’s what I did)
2 – 4* tablespoons water (depending on the flour you use, you might need more, start with 2 tablespoons)
Directions:
Preheat your oven to 350 degrees Fahrenheit
In a large bowl, mix all of your dry ingredients together, if needed sift them to prevent lumps. Set aside.
In a smaller bowl or a blender (which I did), blend all your wet ingredients. A blender works best to prevent clumps of banana/applesauce. Blend until smooth and reserve until ready to bake cupcakes.
It is important to not mix your dry and wet ingredients together until just before you fill the muffin tins, so get them out and line with paper cups or liberally spray with nonstick spray (make sure its gluten free). When your oven is preheated and you’re all ready, Mix the wet into the dry until the lumps are gone. Fill muffin tin to desired levels: full makes about 14 cupcakes with big muffin tops, 3/4 makes 16-18 with just a little top, 1/2 way makes 20-24 cupcakes with no top.
Bake in the middle rack for 20-25 minutes or until a toothpick inserted in the middle comes out clean. If you’re going to frost them let cool completely first or frosting will run. For our frosting recipe please click HERE.
PLEASE TAKE NOTE: If you are making this and cooking for someone with gluten allergies or celiacs disease. Make sure to purchase ingredients that are certified gluten free, and clean your utensils very well. Better safe than sorry.
Prep time: about 5 minutes Cook time: Approx 20-25 minutes
Allergies: banana*(optional) , food dye*(optional)
This recipe is safe for those on a gluten free diet, vegan diet, low fat diet, low calorie diet, and if used, chocolate free diet. This is a great recipe to bring to a party, safe for almost everyone!
(Nutritional information assumes you’re using low fat dairy cream cheese and banana instead of oil, variations in recipe will affect calories:)
Uncategorized

For those wanting to bake without eggs we usually turn to store bought egg replacements like Bob’s Red Mill brand or Ener-G brand. While they are both amazing in their own right, they’re expensive, and what happens if you don’t realize you’re out of it? Well, I’m here to tell you that you can make it at home for a fraction of the price, with 4 basic ingredients.
Ingredients:
10 tablespoons potato starch
6 tablespoons tapioca starch
2 tablespoons plus 2 teaspoon baking powder
1 tablespoon plus 1 teaspoon baking soda
Directions:
Mix well and store in a container til use. Will last very long time and is shelf stable.
This makes about 12 egg equivalent. Original recipe HERE.
How to use in recipe:
If a recipe calls for just the powder, do not add addition water. If recipe calls for a mixed egg always mix in a separate container and use this formula (this varies from original recipe):
one whole egg: 1 1/2 teaspoons powder to 2 tablespoons water
egg white: same as whole egg
egg yolk: 1 1/2 teaspoons powder to 1 tablespoon water.
This replacement is not suitable for things like scrambles eggs and the like, this is for baking.
PLEASE TAKE NOTE: If you are making this and cooking for someone with gluten allergies or celiacs disease. Make sure to purchase ingredients that are certified gluten free, and clean your utensils very well. Better safe than sorry.