Spent a total of $226.35 YIKES! That is over my $200 monthly budget for everything. Well, I had to stock up on staples and supplies. Guess I can splurge this month.
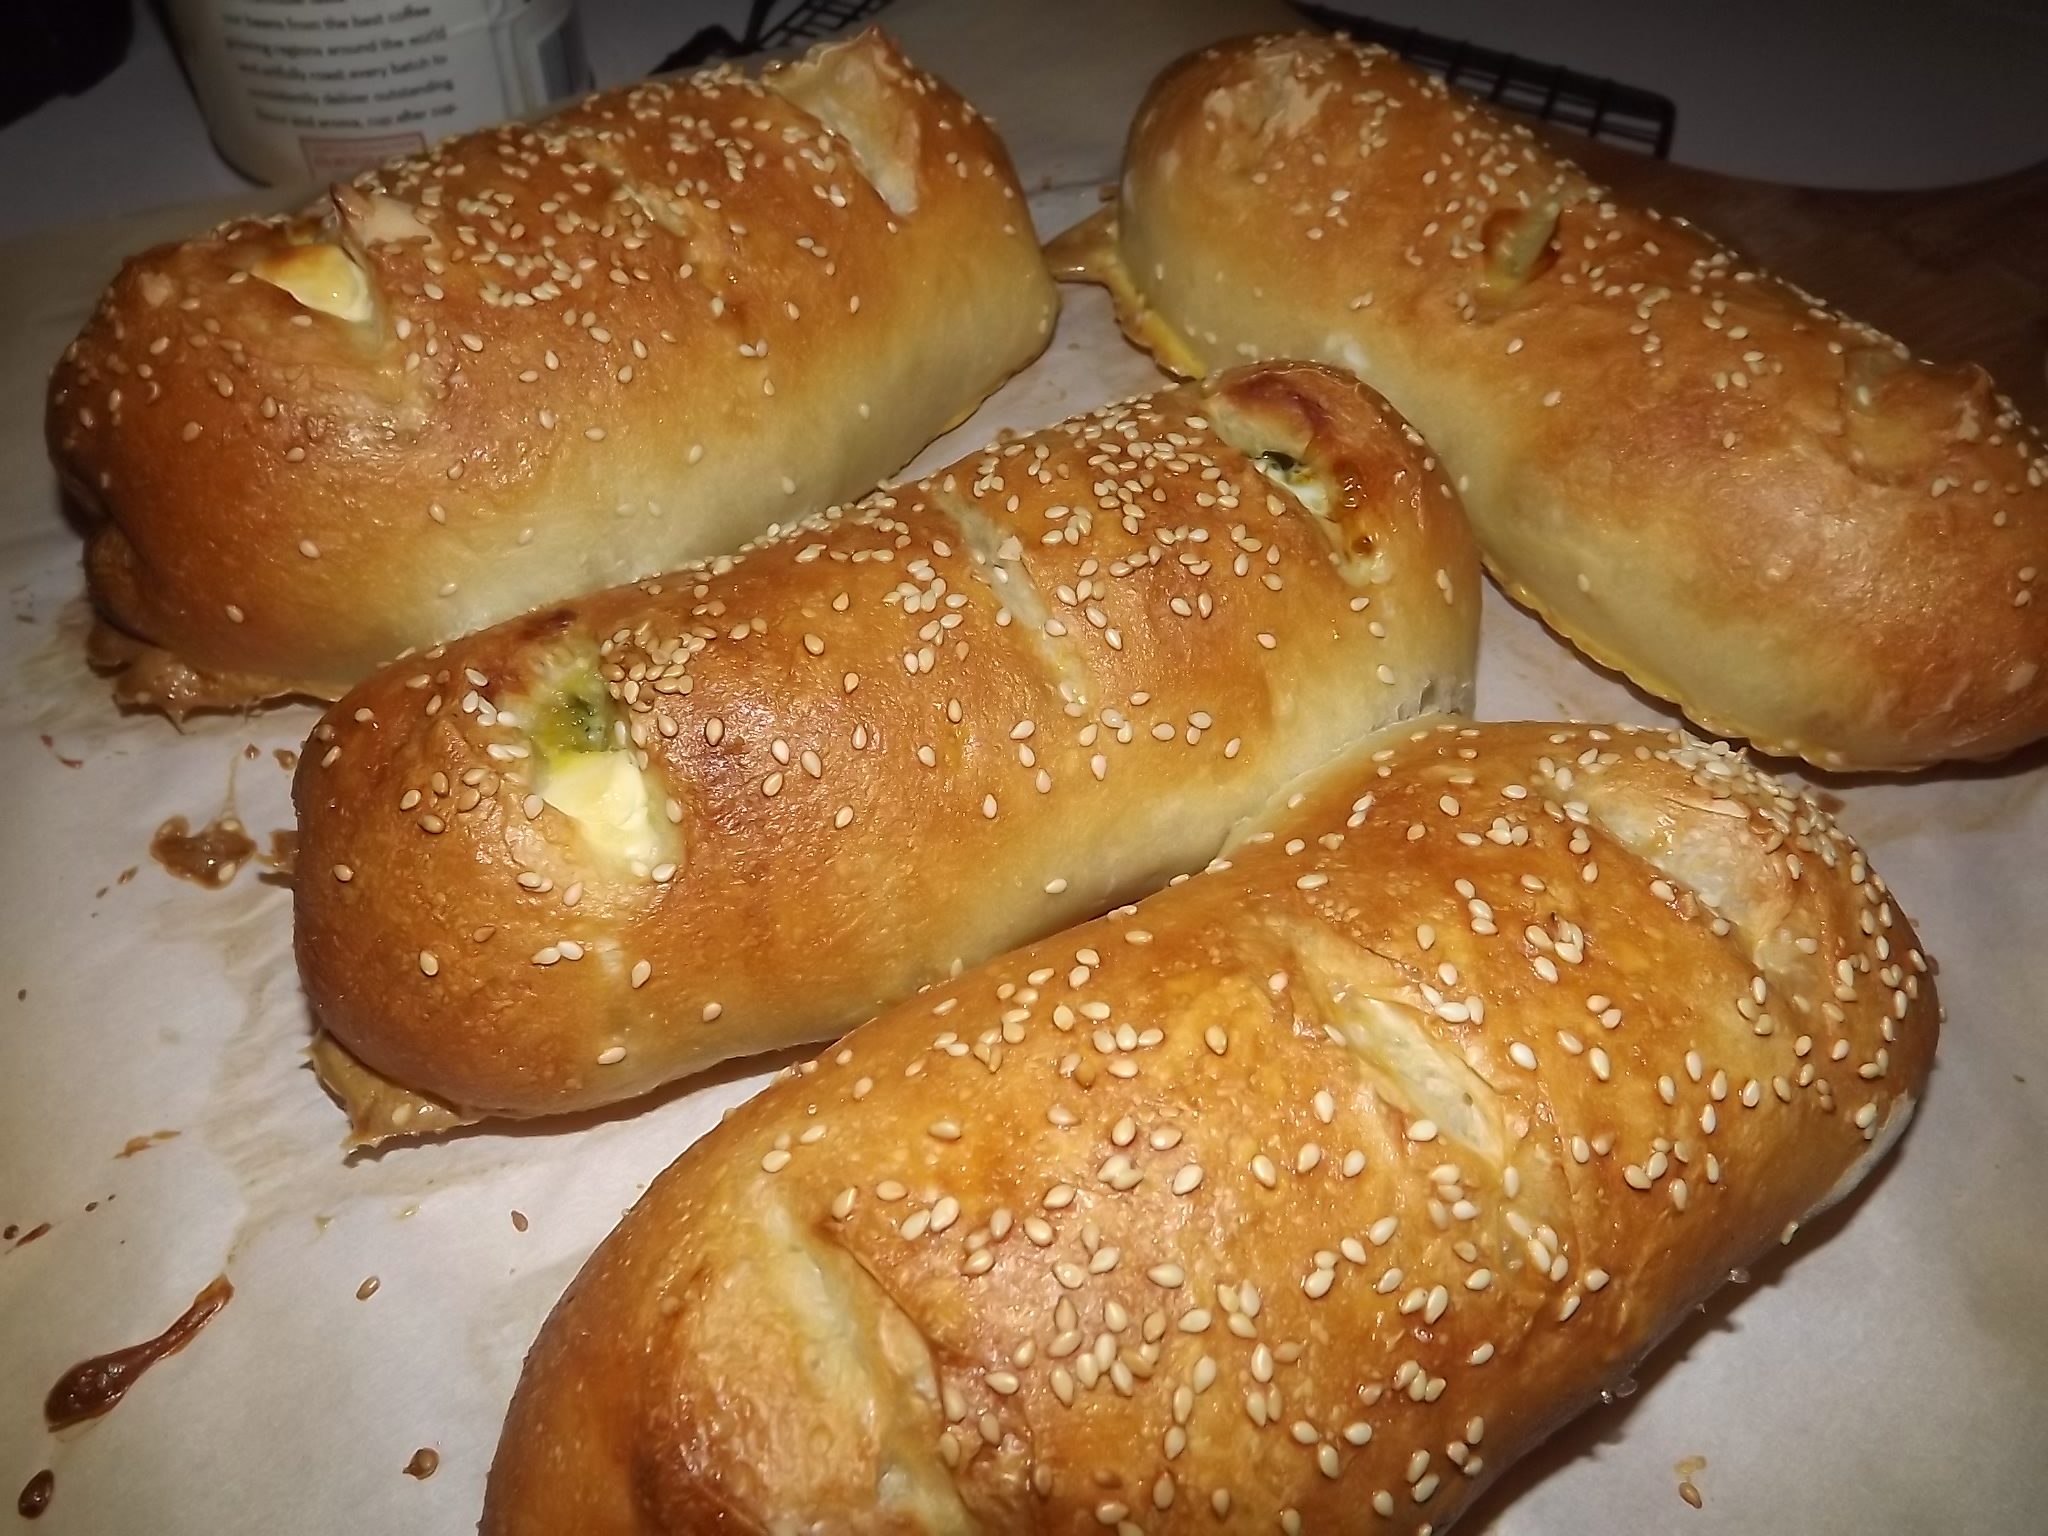
After I posted a photo of my homemade bread stuffed with cream cheese and candied chili peppers in a Facebook group, everyone all but demanded I show them how to do it. Of course I agreed happily, as any excuse to make this wonderful bread is welcomed in my house. I have to thank Steve Gamelin off of YouTube who has taught me so much about making bread easily. I have adapted this technique and hope to show you many recipes using the no knead overnight method. If you would like to check out his book, and I HIGHLY suggest you do because it is awesome. Here a link to amazon where it can be purchased or borrowed with amazon unlimited. My No-Knead Bread Cookbook (B&W Version): From the Kitchen of Artisan Bread with Steve.
I decided to make 4 larger sized rolls with this recipe so I used 1/2 block of cream cheese and 4 ounces of jalapenos but you can make 6, just adjust the recipe accordingly.
No Knead Bread stuffed with chili peppers & Cheese! (Pan relleno de chiles y queso!)
3 cups all purpose or bread flour (unbleached is best)
12 ounces of cool water
¼ teaspoon instant yeast
1 teaspoon salt
Fillings:
1 ounce cream cheese per piece of bread
1 ounce pickled/candied jalapenos per piece of bread
Topping: (optional)
1 whole egg
1 tablespoon water
1 tablespoon sesame seeds
Suggested Materials:
Baking stone that can go at least 450° F
Parchment paper cut to the size of your stone
Wire cooling rack
Bowl/bench scrapper
Large glass bowl
Plastic wrap
Silicone brush
Instructions
At least 8 hours before you want to make the bread, (14 is better), mix the dough ingredients in a bowl like shown in the video. A large glass bowl works best for you. Cover with plastic wrap and let set on your kitchen counter overnight. If your house is cold/drafty place into the oven and close the door. This should help keep it slightly warmer.
Once your dough as more than double in size, scrape it out onto a well floured work surface. Form it into a ball as shown in the video and divide into 4 or 6 pieces. Take one piece of dough at a time and flatten it into about the size of your hand (roughly 6in x 3in). Place your cream cheese and jalapenos on top and pinch it closed. (really watch the video, much easier than describing it)
Place onto parchment paper or baking sheet. Repeat with all pieces of dough. Cover with a flour sack towel or any lint free towel and let rise on your counter for 90 minutes. After 90 minutes get your oven preheating to 450°F and set your timer for an additional 30 minutes. In total dough should rise for 120 minutes (2 hours). If you don't have a pizza stone please see NOTES
After 2 hours, prepare your egg wash by mixing water and egg thoroughly. Use your silicone brush to thoroughly baste the tops of the dough with egg. Cut 2 or 3 slashes onto the tops with scissors and sprinkle with sesame seeds if desired.
Put into a hot oven on a pizza stone for 20-25 minutes. Bread should be nicely browned and when you tap on the bottom they sound hallow. Transfer to a wire rack and let cool for at least 20 minutes before cutting into them. If you skip the step the dough might not be cooked all the way through... and that would be sad. 🙁
Store in the fridge for 3 days at most for best results.
Notes
Bread can be frozen if desired. Cool completely. Wrap in plastic wrap and aluminum foil to prevent freezer burn. Store in a zip top bag and use within a few months.
If you do not have a pizza stone you CAN make this without, you just might not get as good of crust. Line a baking sheet with parchment paper or sprinkle down cornmeal on the bottom to prevent sticking. Let dough rise for 1 hour 45 minutes. Preheat the oven for only 15 minutes and baking directly on the tray. Remove from the tray onto rack when done cooking.
A probably not very traditional pork and shrimp shumai recipe that is easy to make and very customize-able. Feel free to replace all or most of the shrimp with pork or another meat. Try chicken or lamb, skys the limit! They are lighter in flavor so feel free to double the seasoning if you prefer stronger flavor.
Author: FaylinaMeir
Recipe type: Appetizer
Cuisine: Asian
Serves: 42
Ingredients
Shumai
½ to ¾ lb ground pork
1 lb shrimp, raw shrimp is preferred but if you cannot find choose cooked shrimp that you have thawed for at least 24 hours
¼ cup onion or 6-8 green onion
1 tablespoon soy sauce
1 tablespoon sesame oil
2 tablespoons ginger, about a 2 inch piece
1 tablespoon crushed garlic
pepper to taste
1 tablespoon potato or corn starch
30-60 circle style dumpling wrappers or cut square wrappers with a 4 inch circle cutter
Dipping Sauce
2 tablespoons rice wine vinegar
2 tablespoons soy sauce
some chopped onion
some chopped chili peppers or pinch of ground chili, optional for heat
½ teaspoon sesame oil
pinch sugar
Instructions
Shumai
Pulse shrimp, garlic, ginger, and onion in a food processor until small pieces. Try not to blend it into a paste, you want some texture. If you prefer you can turn half of it into a paste, but no more than that.
Mix in a bowl with the pork, soy sauce, sesame oil, and starch powder very well. Use your hand and get in there and squeeze it together. Let this mixture sit at least 15 minutes. Several hours is better up to 8 hours in the fridge.
After at least 15 minutes, get a pot of water boiling with your steam basket. At least an inch, maybe two. I suggest you wrap your lid like shown in the video to prevent water from dropping into your shumai.
For filling, wet the wrapper with water quickly and take 1 tablespoon of meat mixture and place into the middle of the wrapper. Make a circle with your hand and use that to push the filling into the wrapper. Pinch the top a bit and pleat the insides if necessary. Squeeze in the middle a little and push against the counter to flatten the bottom. Repeat this for the entire bowl. You should get 30-60 depending on how much you add into the wrappers. I got 42.
Once you're done making all the shumai, add them to your steamer, you want to fill the steamer but don't let them touch. Steam them for 10-20 minutes depending on the size you made. I checked mine after 15 minutes and they were done. You'll want to cook it until the internal temp reaches 145. (If you don't own a thermometer and you should!) cook until the inside is no longer pink.
Let cool for a few minutes before eating. Serve with soy sauce or a vinegar soy dipping sauce.
Dipping Sauce
Mix together and serve. The onions taste amazing if you let this sit in the fridge overnight however.